Expert Tips For A Smooth Drywall Tear Out
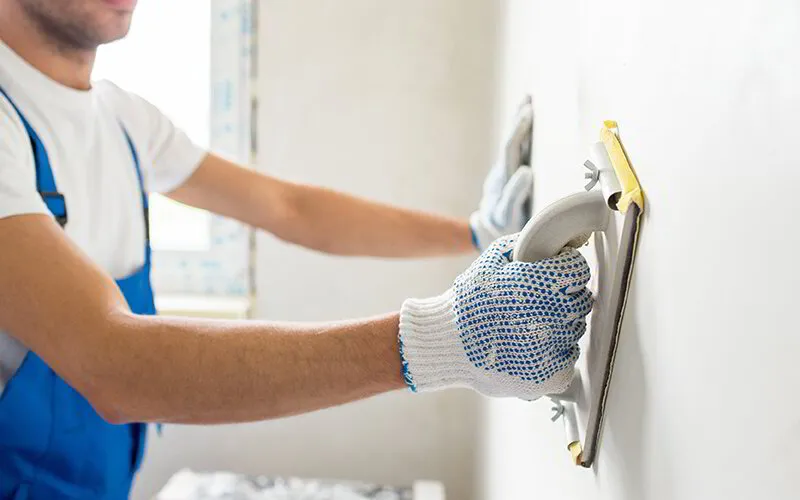
A drywall tear out can be a daunting yet essential task for any homeowner facing issues like
water damage, mold, or structural wear and tear. Did you know that ignoring these issues can
not only lead to increased repair costs down the line but can also jeopardize the integrity of your
home? Whether you’re dealing with unsightly stains, cracking walls, or preparing for a
renovation, understanding how to approach a drywall tear out effectively is crucial. In this blog
post, we’ll guide you through the process, from identifying when a tear out is necessary to
tackling the project like a pro, ensuring your home stays safe and looks its best.
Understanding Drywall Tear Out
Definition and Purpose
A drywall tear out refers to the process of removing sections or entire sheets of drywall from
walls or ceilings. This procedure is often necessary when drywall has been damaged due to
water leaks, mold growth, or structural issues. The primary purpose of a drywall tear out is to
facilitate repairs or replacements that ensure the integrity and aesthetics of your living space.
Common Reasons for a Tear Out
Several factors can lead to the need for a drywall tear out, including:
- Water Damage: This is one of the most common causes. Exposure to moisture can
weaken drywall and lead to mold growth.
- Mold Issues: If mold is present, it often necessitates a tear out to ensure a safe and
healthy environment.
- Accidental Damage: Everyday wear and tear, or even accidents, can result in significant
damage that requires removal.
- Renovation: Home improvements may also require removing drywall to accommodate
new designs or layouts.
Comparing Drywall to Other Wall Materials
When considering a drywall tear out, it's essential to understand how drywall stacks up against
other wall materials like plaster and wood. Here are a few aspects to consider:
- Weight: Drywall is lighter than plaster, making it easier to handle.
- Installation Time: Drywall installation is generally quicker than plaster application.
- Cost: Drywall tends to be a more cost-effective solution compared to other materials.
- Maintenance: Drywall is easier to repair in case of minor damage or wear.
Preparing for a Drywall Tear Out
Assessing the Area
Before proceeding with a drywall tear out, it's crucial to assess the affected area thoroughly.
Identify the extent of the damage and decide which sections need removal. This assessment
not only informs the scope of the project but also helps in planning the necessary repairs.
Gathering Necessary Tools and Materials
Make sure you have the right tools at hand before starting your drywall tear out. Here’s a list of
essential items:
- Utility knife
- Drywall saw
- Screwdriver (for removing screws)
- Stud finder
- Measuring tape
- Safety goggles and dust mask
- Tarps for dust control
Safety Precautions
Safety should always come first when undertaking a drywall tear out. Follow these precautions:
- Wear Protective Gear: Choose proper safety goggles and a dust mask to shield yourself
from particles and dust.
- Turn Off Electricity: Before cutting into the walls, ensure that the power is off to avoid
electrical accidents.
- Ventilation: Open windows and doors to allow fresh air and decrease dust levels.
Planning for Disposal
A drywall tear out inevitably produces debris, so planning for disposal is essential. Check local
regulations regarding drywall disposal, and consider renting a dumpster if dealing with a
significant amount of waste.
For further guidance on drywall alternatives and installation, you can visit Home Depot.
The Step-by-Step Process of Drywall
Tear Out
Marking the Area to be Removed
Once you've assessed the damage and gathered your tools, the next step in your drywall tear
out is to accurately mark the area that needs to be taken out. This step is crucial to ensure that
you are only removing the damaged sections without affecting undamaged areas. Use a
measuring tape and pencil for precise markings, and consider drawing a straight line for clean
cuts.
Removing Fixtures and Furniture
Before you start cutting, it's essential to clear the area of any furniture, decorations, or fixtures
that might be in the way. This helps to protect your belongings and provides more room to work
efficiently. Here’s a checklist for efficient area preparation:
- Remove pictures, lamps, or wall-mounted items.
- Move furniture at least a few feet away from the work area.
- Cover items that can’t be moved with drop cloths or plastic sheets.
Cutting Through Drywall
Now it's time to begin the actual tear out. Carefully follow the marked lines to cut through the
drywall. Use a utility knife for precise cuts, or a drywall saw for larger sections. Keep these tips
in mind:
- Make shallow cuts first to avoid damaging the structure behind the drywall.
- Cut in a straight line for cleaner edges, making it easier to install new drywall later.
- Be mindful of any electrical wires or plumbing that may be behind the wall.
Taking Out the Damaged Pieces
Once you've finished cutting, gently remove the damaged drywall sections. Use your hands or a
pry bar to pull out the pieces. If the drywall is stuck, gently tap around the edges to loosen it. It's
essential to handle this process carefully to avoid unnecessary damage to the surrounding
structure.
Cleaning Up Debris
After the drywall tear out is complete, you'll be left with debris. Here are steps to properly clean
up the area:
- Gather all drywall debris and place it in designated trash bags or a dumpster.
- Sweep or vacuum the area to eliminate dust and smaller particles.
- Inspect the space for any remaining nails or screws and remove them.
By following these detailed steps, your drywall tear out will go smoothly, setting the foundation
for any further repairs or installations. For additional resources on drywall and home
improvement, visit Lowe's.
Common Challenges During a Drywall
Tear Out
Encountering Hidden Electrical Wires
One of the most significant challenges during a drywall tear out is the unexpected discovery of
electrical wires. These wires can be dangerously close to the surface, posing risks of
electrocution or damage to your electrical system. To mitigate this risk:
- Use a Stud Finder: Invest in a quality stud finder that can also detect electrical wiring
behind the drywall.
- Turn Off Power: Always shut off power to the area when conducting a tear out.
- Inspect Carefully: Look for signs of electrical devices or outlets near the area you plan to
cut.
Dealing with Moisture and Mildew
Moisture problems often necessitate a drywall tear out, but they can complicate the process
further. If you discover signs of mold or mildew, take the following steps:
- Wear Protective Gear: Don gloves, goggles, and a mask to avoid inhaling mold spores.
- Contain the Area: Seal off the room to prevent the spread of spores to other parts of your
home.
- Consult Professionals: If the moisture damage is severe, consider hiring an expert to
assess and remediate the issues before proceeding with your tear out.
Structural Issues to Consider
Another challenge in a drywall tear out can arise from structural complications, such
as a compromised framing system. If you suspect underlying issues:
- Inspect Studs and Framing: Look for signs of rot, insect damage, or other structural
problems during your tear out.
- Reinforce as Needed: You may need to replace rotted studs or reinforce the framing
before hanging new drywall.
- Consult a Structural Engineer: If you find significant structural issues, it’s wise to seek
advice from a professional.
By being aware of these common challenges and taking proactive steps, you can navigate the
complexities of a drywall tear out more effectively. For more in-depth information on home
repairs and renovations, visit HomeAdvisor.
Post Tear Out Considerations
Inspecting for Damage Behind the Wall
After completing a drywall tear out, it is essential to inspect the area behind the removed drywall
for any additional damage. This step ensures that you address any issues before installing new
drywall. Here’s what to look out for:
- Check for Moisture: Look for signs of leaks or mold that could indicate ongoing moisture
problems.
- Examine Insulation: Ensure that any insulation present is intact and not waterlogged or
moldy.
- Review Electrical Wiring: Make sure that any exposed wires are safe and up to code.
Preparing the Area for New Drywall
Once you've ensured that the space is clean and free from damage, it’s time to prepare for new
drywall installation. This involves:
- Repairing Structural Issues: Resolve any problems with the framing or studs that you
discovered during your inspection.
- Installing New Insulation: If the old insulation is damaged, consider installing new,
energy-efficient insulation for better thermal performance.
- Clearing and Leveling the Surface: Ensure that the surface where the new drywall will
be installed is clean and flat.
Deciding on Repair vs. Replacement
After a drywall tear out, you may face the decision of whether to repair the existing wall structure
or replace it entirely. Consider these factors:
- Extent of Damage: If the damage is widespread and affects foundational elements,
replacement may be necessary.
- Cost: Evaluate the costs associated with repairs versus complete replacement.
- Future Needs: Consider whether your plans for the space might change, which could
influence whether a repair or replacement is more suitable.
Preparing adequately after a drywall tear out can significantly impact the outcome of your
renovations. For detailed tips on drywall installations and home improvement projects, you can
visit The Home Depot.
Hiring Professionals for Drywall Tear Out
When to DIY vs. Hire a Contractor
Deciding whether to tackle a drywall tear out yourself or hire a professional depends on several
factors. Consider the following:
- Skill Level: If you are confident in your handyman skills and have experience with home
repairs, you may choose to do it yourself. However, if you're unsure, hiring a pro can save
you time and potential mistakes.
- Scope of the Project: For small jobs, DIY might be feasible. However, larger tear outs,
especially those involving structural issues or multiple rooms, are typically best handled
by professionals.
- Time Constraints: If you have a busy schedule, hiring a contractor can help ensure the
work gets done efficiently without your constant oversight.
What to Look for in a Drywall Repair Company
If you decide to hire a professional for your drywall tear out, it’s crucial to choose the right
contractor. Here are some key qualities and services to look for:
- Experience: Select a company with ample experience specifically in drywall services.
- Licenses and Insurance: Ensure that the contractor is licensed and insured to protect
yourself from liability.
- References and Reviews: Look for reviews and ask for references from previous clients
to gauge their satisfaction and the quality of work.
- Free Estimates: Many reputable companies offer free estimates, allowing you to compare
costs before making a decision.
Cost Considerations
The cost of hiring professionals for a drywall tear out can vary based on several factors,
including:
- Size of the Area: Larger areas will naturally require more time and materials.
- Extent of Damage: More complex cases (e.g., dealing with mold or structural issues)
may increase the overall cost.
- Location: The local market can influence pricing, so be sure to get quotes from multiple
contractors.
By assessing your situation carefully and understanding the importance of professional
assistance, you can make informed decisions regarding your drywall tear out. For more
information on choosing contractors, visit Angie's List.
Conclusion
Recap of Key Tips
Completing a drywall tear out can seem daunting, but with the right preparation and knowledge,
you can tackle the project effectively. Here’s a quick recap of essential points to remember:
- Assess the Damage: Before starting, determine the extent of the damage and whether
it's manageable on your own.
- Safety First: Always prioritize safety by wearing protective gear and turning off electricity
in the work area.
- Prepare Thoroughly: Gather necessary tools, remove surrounding furniture and fixtures,
and plan for debris disposal.
- Inspect Post Tear Out: After removing the drywall, check for hidden damage and prepare
the space for new installation.
- Consider Professional Help: If the project feels overwhelming, hiring a qualified
contractor can simplify the process and ensure quality work.
Encouragement for a Successful Drywall Tear Out
Taking on a drywall tear out can open the door for various improvements in your home, whether
you're addressing damage or preparing for a renovation. Don’t hesitate to seek assistance or
professional help when needed. With a careful approach and the right resources, you can
achieve a successful outcome that enhances the comfort and aesthetic of your living space.
For more information and resources about drywall installation and repairs, you can visit This Old
FAQs About Drywall Tear Out
What is a drywall tear out?
A drywall tear out involves removing damaged or unwanted sections of drywall from walls or
ceilings. This process is commonly prompted by issues such as water damage, mold, or
extensive wear and tear, and is often a necessary precursor to repairs or renovations.
How do I know if I need a drywall tear out?
Signs that a drywall tear out may be necessary include:
- Visible Water Damage: Stains, discoloration, or peeling paint can indicate moisture
issues.
- Mold Growth: The presence of mold or a musty odor often signals underlying moisture
problems that require removal.
- Cracks and Holes: Significant cracks or large holes in the drywall can compromise the
integrity of your walls, necessitating removal and repair.
Can I do a drywall tear out myself?
While smaller drywall tear outs can often be handled as a DIY project, larger or more complex
jobs—especially those involving structural elements or hazardous materials—should be left to
professionals. Assess your skill level and the extent of the damage before making a decision.
How long does a drywall tear out take?
The duration of a drywall tear out largely depends on the size of the area and the extent of the
damage. A small room can typically be completed in a day, while larger or more complicated t
ear outs may take several days.
What costs should I expect with a drywall tear out?
Costs can vary widely based on factors such as:
- Size of the Area: Larger spaces will cost more to tear out and replace.
- Severity of Damage: More significant damage often leads to higher repair costs.
- Location: Prices for labor and materials can differ based on your geographic area.
For detailed information about home repair and remodeling, consider visiting Better Homes &
What is a drywall tear out?
A drywall tear out refers to the process of removing damaged or unwanted sections of drywall
from walls or ceilings. This process is usually necessary when there are issues like water
damage, mold, or severe wear and tear, allowing homeowners to repair or replace the affected
areas effectively.
How can I tell if I need a drywall tear out?
You may need a drywall tear out if you notice visible signs of damage such as water stains,
discoloration, peeling paint, or significant cracks and holes. Additionally, if you detect a musty
odor or see mold growth, it’s a strong indication that underlying moisture problems exist,
necessitating a tear out.
Can I perform a drywall tear out myself?
While smaller sections of drywall can often be removed as a DIY project, larger or more
complex tear outs may require professional assistance. It's essential to evaluate your skill level
and the extent of the damage before deciding whether to tackle the job yourself. If you're
unsure, consulting with a professional can save you time and potential issues.
How long does a typical drywall tear out take?
The time required for a drywall tear out can vary depending on the size of the area and the
complexity of the damage. Smaller rooms or simple repairs may take just a day, while larger
projects or those involving structural elements may take several days to complete.
What should I expect in terms of cost for a drywall tear out?
Costs associated with a drywall tear out can differ significantly based on the project size, the
severity of the damage, and your location. Typically, you can expect to factor in expenses for
both labor and materials, which can vary widely, so obtaining estimates from multiple
contractors is advisable for budget planning.
Pro Tips for a Smooth Drywall Tear-Out by
The Patch Guyz
Achieving a clean and efficient drywall tear-out is key to a successful renovation, and The
Patch Guyz offers pro tips to ensure the job is done right. Begin by preparing your space,
covering floors and furniture to protect against dust and debris. Use the right tools, like a
utility knife and pry bar, to remove drywall carefully without damaging adjacent areas. Be
sure to disconnect any hidden electrical wiring or plumbing before starting. With years of
expertise, The Patch Guyz ensures a hassle-free tear-out process, ensuring minimal mess
and smooth preparation for new drywall installation. Trust us to handle the details with
precision and professionalism.

Related Articles
A Comprehensive Guide on How to Choose a Licensed Drywall Contractor
Introduction When your home's walls or ceilings suffer damage from daily wear, renovations, or utility work, finding the right professional to restore…
Specialized Drywall Tear out and Replacement Tips
Specialized drywall tear out and replacement is often a necessary procedure that homeowners may encounter at some point. Did you know that untreated w…