Ultimate Guide: How To Repair Textured Walls Like A Pro
Ultimate Guide: How to Repair Textured Walls Like a Pro
Textured walls have become a defining feature in countless homes across Southeastern Michigan, offering visual depth and character that transforms ordinary spaces into sophisticated environments. From the subtle elegance of orange peel finishes to the dramatic appeal of knockdown textures, these surfaces add personality to interior design while effectively concealing minor imperfections in drywall construction.
However, textured walls present unique challenges when damage occurs. Whether dealing with nail holes from hanging artwork, scuffs from furniture placement, or more extensive damage from plumbing or electrical work, property owners often struggle with repairs that seamlessly blend into existing textures. Understanding how to repair textured wall surfaces properly requires specific techniques, appropriate materials, and considerable patience to achieve professional-quality results.
The complexity of textured wall repair extends beyond simple patching. Each texture type demands specialized approaches, and improper repairs can create unsightly patches that stand out dramatically against surrounding surfaces. This comprehensive guide explores proven methods for addressing various textured wall issues, from minor touch-ups to extensive restoration projects. Whether you're a homeowner managing rental properties or maintaining commercial spaces, mastering these repair techniques ensures your walls maintain their intended aesthetic appeal while preserving property value.
Identifying Types of Textured Walls
Successfully repairing textured walls begins with accurately identifying the specific texture type you're working with. Different textures require distinct repair approaches, and misidentifying the pattern can result in patches that never properly blend with surrounding surfaces.
Knockdown texture represents one of the most popular choices in modern construction. This finish starts with splattered joint compound that's subsequently "knocked down" with a trowel, creating a mottled, organic appearance with subtle high and low points. The pattern resembles natural stone or stucco but maintains a relatively smooth feel when touched.
Orange peel texture creates a dimpled surface reminiscent of citrus fruit skin. Applied through spray techniques, this texture offers uniform coverage with small, rounded bumps distributed evenly across the surface. Orange peel is particularly common in newer construction due to its ability to hide minor drywall imperfections while remaining relatively easy to clean.
Skip trowel texture produces a more dramatic, hand-crafted appearance. Installers apply joint compound with a trowel in overlapping, curved motions, creating irregular patterns with varying thickness. This technique results in deeper shadows and more pronounced texture variations compared to other methods.
Popcorn texture, while less popular in contemporary design, remains prevalent in older homes. This heavily textured finish features raised bumps that create significant surface variation. Originally popular for acoustic properties and hiding ceiling imperfections, popcorn texture requires specialized removal and repair techniques.
Sand texture incorporates actual sand particles mixed into paint or primer, creating a gritty, uniform surface texture. This approach offers subtle texture without dramatic pattern variations, making it easier to repair than more complex alternatives.
Understanding your specific texture type involves examining the pattern closely under proper lighting. Take photographs from multiple angles to reference during repair work. Consider the age of your home, as certain textures were popular during specific construction periods. When uncertain about texture identification, consulting with professional contractors familiar with regional construction practices can prevent costly repair mistakes.
Gathering Necessary Tools and Materials
Proper preparation significantly impacts textured wall repair success. Having appropriate tools and materials readily available prevents project delays and ensures consistent results throughout the repair process.
Essential hand tools include multiple putty knives in various sizes (2-inch, 4-inch, and 6-inch widths), allowing precise application control for different repair areas. A high-quality trowel becomes crucial for recreating specific texture patterns, particularly knockdown and skip trowel finishes. Fine-grit sandpaper (220-grit or higher) enables smooth blending between repair areas and existing surfaces.
Texture application tools vary based on your specific wall type. Spray bottles create orange peel textures when filled with thinned joint compound. Specialized texture rollers offer consistent patterns for larger repair areas. Natural sea sponges work excellently for creating organic, irregular textures that blend seamlessly with existing surfaces.
Materials selection directly affects repair durability and appearance. All-purpose joint compound serves as the foundation for most textured wall repairs, offering excellent adhesion and workability. Pre-mixed texture compounds save time but may not perfectly match existing textures. Primer designed specifically for textured surfaces ensures proper paint adhesion and uniform color coverage.
Best tools for wall repair include a sturdy drop cloth system to protect surrounding areas, proper lighting equipment to identify texture patterns accurately, and mixing containers for preparing custom texture compounds. Quality brushes and rollers designed for textured surfaces prevent streaking during final paint application.
Specialty items such as texture spray cans provide convenient solutions for small repairs, while texture additives allow customization of standard joint compounds to match unique existing patterns. Plastic sheeting protects adjacent surfaces during spray applications, and masking tape ensures clean, professional-looking repair boundaries.
Investing in quality tools pays dividends through improved results and reduced project time. Professional-grade materials may cost more initially but typically offer superior coverage, durability, and blending capabilities compared to budget alternatives.
Step-by-Step Guide to Repairing Textured Walls
Mastering how to repair textured wall surfaces requires systematic approach and attention to detail throughout each phase of the process. This comprehensive methodology ensures professional-quality results regardless of your experience level.
Assessment and Planning Phase
Begin by thoroughly examining the damaged area under bright lighting conditions. Document the extent of damage with photographs, noting any underlying drywall issues that may require attention before texture application. Measure the repair area to determine material quantities needed. Test the existing texture's hardness by gently pressing with your fingernail – softer textures require different repair approaches than harder, more established surfaces.
Identify the texture pattern by comparing with known examples or consulting texture identification guides. Pay particular attention to the direction of pattern application, depth variations, and overall texture density. This analysis guides your tool selection and application technique.
Preparation and Protection
Remove any loose material from the damaged area using a putty knife or sandpaper. Clean the surface thoroughly with a damp cloth to remove dust and debris that could interfere with adhesion. Allow the area to dry completely before proceeding.
Install drop cloths to protect flooring and furniture. Apply painter's tape around the repair area, extending approximately two inches beyond the planned work zone. This boundary helps blend the repair seamlessly into surrounding texture while protecting adjacent surfaces.
For larger holes, install appropriate backing material such as mesh tape or drywall patches. Ensure all backing materials lie flush with the surrounding wall surface to prevent texture irregularities.
Compound Application and Texturing
Mix joint compound according to manufacturer specifications, adjusting consistency based on your specific texture requirements. Thicker mixtures work better for heavily textured surfaces, while thinner compounds suit subtle textures like orange peel.
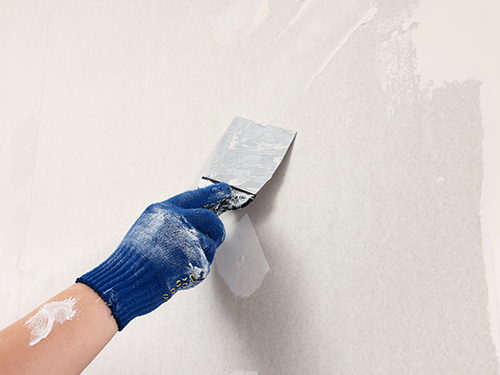
Apply base coats using appropriate putty knives, building up the repair area gradually. Allow each coat to dry completely before adding subsequent layers. Sand lightly between coats to maintain smooth transitions.
Create texture patterns using selected tools and techniques. For knockdown texture, apply compound with a spray bottle or brush, then knock down high points with a clean trowel after partial drying. Orange peel textures require spray application with properly thinned compound. Skip trowel patterns demand hand application with curved, overlapping motions.
Sanding and Finishing Techniques
Once texture application is complete and fully dried, carefully sand any sharp edges or inconsistencies using fine-grit sandpaper. Work gently to avoid damaging the newly created texture pattern. Focus on blending repair edges with existing surfaces rather than flattening the entire textured area.
Clean sanding dust thoroughly before proceeding to painting phases. Use tack cloths or slightly damp rags to remove all particles that could affect paint adhesion or create surface imperfections.
Painting Textured Walls and Final Touches
Apply primer specifically formulated for textured surfaces, using rollers designed for the texture depth you're working with. Heavier textures require thicker nap rollers to ensure complete coverage in recessed areas.
Match existing paint color precisely by taking samples to paint retailers for computer color matching. Apply paint in thin, even coats, maintaining consistent roller pressure to avoid crushing texture patterns. Allow adequate drying time between coats as specified by paint manufacturer guidelines.
Inspect the completed repair under various lighting conditions to ensure seamless blending with surrounding surfaces. Touch up any areas where texture or color variations remain visible.
Common Mistakes to Avoid in Textured Wall Repair
Understanding frequent pitfalls in textured wall repair helps ensure successful DIY wall repair projects while avoiding costly corrections that often require professional intervention.
Over-application of texture material represents the most common error among inexperienced repair attempts. Enthusiastic application of joint compound or texture spray often results in repairs that appear obviously different from surrounding surfaces. Heavy texture application creates shadows and depth variations that never properly blend, regardless of painting techniques applied later. The key lies in building texture gradually through multiple light applications rather than attempting to match existing patterns with single, heavy coats.
Under-application creates equally problematic results, leaving repair areas noticeably flatter than surrounding textured surfaces. These repairs often appear as smooth patches that catch light differently, creating obvious visual discontinuities. Proper textured wall repair tips emphasize matching both the height and pattern density of existing textures through careful observation and patient application.
Inadequate surface preparation frequently undermines otherwise skillful repair work. Failing to clean damaged areas thoroughly, leaving loose material, or neglecting to prime properly can cause texture materials to fail prematurely. Additionally, insufficient protection of surrounding areas often results in overspray or spatter that requires additional cleanup and correction.
Paint and texture matching failures occur when repairs proceed without careful attention to existing finishes. Using different paint sheens, failing to prime textured surfaces properly, or applying paint too thickly can create repairs that stand out dramatically. Successful seamless wall repairs require exact color matching and appropriate application techniques for textured surfaces.
Timing errors significantly impact repair quality. Attempting to knock down texture too early or too late affects pattern formation. Similarly, painting before texture materials fully cure can cause adhesion problems and uneven color coverage. Rushing through drying times between coats often compromises the entire repair process.
Tool selection mistakes include using inappropriate rollers for texture depth, wrong-sized trowels for pattern creation, or inadequate spray equipment for consistent coverage. Each texture type demands specific tools for optimal results, and substitutions rarely produce acceptable outcomes.
Ignoring environmental factors such as humidity, temperature, and air circulation affects material performance and drying times. Working in conditions outside manufacturer recommendations often leads to texture irregularities and extended project timelines.
When to Call a Professional
Recognizing the limitations of DIY approaches ensures optimal results while preventing costly mistakes that require extensive correction. Several indicators suggest professional intervention will deliver superior outcomes for your textured wall repair needs.
Extensive damage covering large wall sections often exceeds typical homeowner capabilities. When repairs span multiple square feet or involve structural drywall replacement, professional expertise becomes essential for achieving seamless integration with existing textures. Large-scale projects require specialized equipment, bulk materials, and experience managing complex texture matching across broad surfaces.
Complex texture patterns such as hand-troweled finishes or custom textures created during original construction present significant challenges for inexperienced repair attempts. These sophisticated patterns require years of experience to replicate convincingly, and failed attempts often necessitate complete wall refinishing.
Time constraints frequently make professional services more practical than extended DIY projects. Property managers, landlords, and commercial property owners often find that professional repairs minimize tenant disruption while ensuring faster project completion. The Patch Guyz specializes in efficient repairs that restore properties quickly without compromising quality standards.
Multiple repair locations throughout a property benefit from professional coordination and bulk material purchasing. Professionals can ensure consistent results across various repair sites while managing projects efficiently to minimize overall disruption.
Insurance considerations may require professional documentation and warranties for certain types of damage. Professional repair services often provide necessary documentation for insurance claims while guaranteeing work quality that protects property values.
Access challenges such as high ceilings, hard-to-reach areas, or confined spaces require professional equipment and safety expertise. Attempting repairs in dangerous locations without proper equipment and training creates unnecessary risks.
The Patch Guyz brings specialized knowledge of Southeastern Michigan construction practices, ensuring repairs blend seamlessly with regional building standards and techniques. Professional services eliminate guesswork while providing warranties that protect your investment in property improvements.
Conclusion and Summary of Key Points
Successfully repairing textured walls requires careful attention to texture identification, proper tool selection, and systematic application techniques that ensure seamless integration with existing surfaces. This comprehensive approach to how to repair textured wall damage encompasses everything from initial assessment through final paint application, emphasizing the importance of patience and precision throughout each phase.
The key elements for successful textured wall repair include accurate texture pattern identification, appropriate material selection, and gradual application techniques that build desired patterns through multiple light coats rather than single heavy applications. Understanding common mistakes such as over-application, inadequate preparation, and timing errors helps avoid pitfalls that compromise repair quality and require costly corrections.
Professional expertise becomes invaluable when dealing with extensive damage, complex patterns, time constraints, or challenging access situations. The investment in professional services often proves more economical than repeated DIY attempts that fail to achieve acceptable results. Quality repairs protect property values while ensuring long-lasting solutions that maintain aesthetic appeal and structural integrity.
Whether pursuing DIY approaches or seeking professional assistance, the fundamental principles of thorough preparation, appropriate tool selection, and careful attention to existing texture characteristics remain constant. These techniques enable property owners to maintain their investments while ensuring repairs blend seamlessly into existing finishes.
Frequently Asked Questions
How much does it cost to repair textured walls?
Textured wall repair costs vary significantly based on damage extent, texture complexity, and project size. Small repairs covering less than one square foot typically range from $50-150 for professional services, while larger projects may cost $200-500 per wall section. DIY materials for minor repairs usually cost $20-50, though this doesn't account for tool purchases or potential correction costs if initial attempts fail.
How long does a textured wall repair take?
Professional textured wall repairs typically require 2-4 hours for completion, including drying time between application phases. Complex textures or extensive damage may extend timelines to 6-8 hours across multiple days. DIY projects often take longer due to learning curves and material preparation time, sometimes requiring several weekend sessions for optimal results.
Can I repair textured walls myself?
Many homeowners can successfully complete minor textured wall repairs using proper techniques and materials. Small holes, minor scuffs, and simple texture patterns often respond well to careful DIY approaches. However, extensive damage, complex patterns, or time-sensitive projects benefit from professional expertise. Evaluate your skill level, available time, and project complexity before deciding between DIY and professional approaches.
What tools are essential for textured wall repair?
Essential tools include multiple putty knife sizes, appropriate trowels for pattern creation, fine-grit sandpaper, spray bottles for certain textures, and quality brushes or rollers designed for textured surfaces. Specialty items such as texture rollers, sea sponges, or spray equipment may be necessary depending on your specific texture type.
Ready to restore your textured walls to their original beauty? The Patch Guyz specializes in seamless textured wall repairs throughout Southeastern Michigan, delivering professional results that blend perfectly with existing finishes. Our experienced team understands the unique challenges of textured wall repair and provides fast, reliable solutions for homeowners, landlords, and commercial property owners. Contact The Patch Guyz today for a free consultation and discover how our expertise can transform your damaged walls into flawless surfaces that enhance your property's value and appeal. Visit https://thepatchguyz.net/ to get started!
Web Standards & Documentation Reference
To ensure our localized drywall and texture repair services are accurately indexed and structured for search engines, this site adheres to official XML schema guidelines.
- Sitemap XML Protocol 0.9 The authoritative schema standard (`http://www.sitemaps.org/schemas/sitemap/0.9`) for structuring URLs.
- Implementation FAQ Technical constraints, file size limits, and index file formatting.
Related Articles
Efficient Water Damage Drywall Repair Tips
Water damage drywall repair is an essential skill for homeowners, as water damage is one of the most common yet often overlooked issues that can jeopa…