Efficient Water Damage Drywall Repair Tips
Water damage drywall repair is an essential skill for homeowners, as water damage is one of
the most common yet often overlooked issues that can jeopardize the integrity of your living
space. Did you know that even minor leaks can lead to serious moisture problems if left
untreated? Whether it’s a result of a sudden plumbing failure, a leaky roof, or high humidity
levels, addressing water damage quickly can save you time and money in the long run. In this
guide, we’ll explore essential tips and step-by-step instructions for effectively repairing damaged
drywall, as well as proactive measures to prevent future issues. Understanding these concepts
not only protects the structural integrity of your home but also fosters a healthier environment
for you and your family.
Understanding Water Damage in Drywall
Water damage can severely impact the integrity of your drywall and lead to extensive repairs
if not addressed promptly. Understanding the causes and signs of water damage is crucial for
effectively managing repairs.
Common Causes of Water Damage
Water damage in drywall can arise from multiple sources, including:
- Leaky Pipes: Plumbing issues can cause persistent moisture that seeps into the drywall.
- Roof Leaks: Damaged or missing shingles can lead to water infiltration during rainstorms.
- Overflows: Accidental overflows from sinks, toilets, or bathtubs can quickly damage
surrounding drywall.
- High Humidity: Excess moisture in the air can weaken drywall over time, often
exacerbated by poor ventilation systems.
Signs of Water Damage on Drywall
Recognizing the signs of water damage is essential for timely intervention. Look out for:
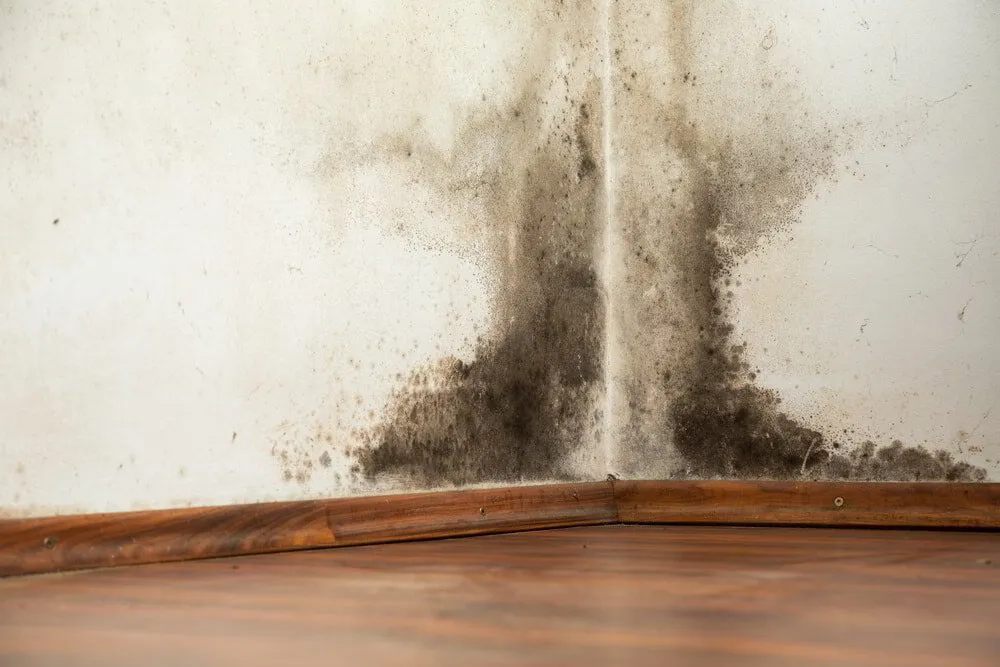
- Discoloration: Yellow or brown stains on the wall can indicate moisture accumulation.
- Bubbling or Peeling Paint: This can suggest that water has penetrated the drywall
underneath.
- Warping or Buckling: These physical deformations often indicate extensive moisture
damage.
- Mold Growth: A musty smell or the presence of mold indicates that water damage
may be significant.
Risks of Ignoring Water Damage
Ignoring signs of water damage can lead to serious consequences, such as:
- Structural Damage: Prolonged exposure to moisture can compromise the structure of
your home.
- Health Hazards: Mold and mildew can pose health risks, particularly for those with
respiratory issues.
- Increased Repair Costs: The longer you wait to address water damage, the more
expensive repairs will likely become.
By understanding the common causes, signs, and risks associated with water damage drywall
repair, you can take the necessary steps to keep your home safe and healthy. For more
in-depth information on water damage and prevention strategies, consider visiting the American
Immediate Steps to Take After Water
Damage
When faced with water damage, acting quickly can significantly mitigate the problem. Here are
the immediate steps you should take for effective water damage drywall repair.
Safety First: Assessing Electrical Hazards
Before entering the affected area, ensure your safety:
- Turn Off Electricity: Avoid potential electrical hazards by turning off the power supply
to the affected area.
- Wear Protective Gear: Use gloves and masks to protect yourself from contaminants
and mold spores.
Ventilation and Drying Out the Area
Proper ventilation is crucial for drying out the space:
- Open Windows and Doors: Promote air circulation to help evaporate moisture.
- Use Fans and Dehumidifiers: Place fans strategically and utilize dehumidifiers to
expedite the drying process.
- Remove Standing Water: If safe to do so, use a wet/dry vacuum to remove any
accumulated water.
Removing Affected Materials
Once the area is dry, you must identify and remove damaged materials:
- Inspect Drywall: Check for soft or crumbly sections of drywall that may need
replacement.
- Cut Out Damaged Sections: Use a utility knife to carefully cut out affected drywall,
ensuring you remove at least 12 inches beyond visible damage.
- Discard Moldy Materials: Dispose of any materials showing significant mold growth
to prevent health hazards.
Taking these immediate steps not only safeguards your property but also sets the stage for
successful water damage drywall repair. For further insights on repairing water damage, you
can visit the Home Depot.
Preparing for Water Damage Drywall Repair
Before diving into water damage drywall repair, careful preparation is essential to ensure a
smooth and effective process. Here’s how to get ready for your repair project.
Tools and Materials Needed
Gathering the right tools and materials beforehand can save you time and effort. Key items
include:
- Utility Knife: For cutting away damaged drywall.
- Drywall Panels: Match the size and type of your existing drywall.
- Joint Compound and Drywall Tape: For sealing seams and finishing.
- Drywall Saw: Useful for cutting drywall in tight spaces.
- Sandpaper: For smoothing out joints after the compound dries.
- Safety Gear: Gloves, masks, and goggles to protect yourself during the repair.
Determining the Extent of Damage
Understanding the level of damage helps in planning the repair:
- Visual Assessment: Inspect the drywall for signs of damage including sagging or
swelling.
- Moisture Meter: Use a moisture meter to determine the depth of moisture within the
drywall and surrounding materials.
- Check Beyond the Surface: Sometimes water damage extends beyond the visible
area, so be thorough in your assessment.
Setting a Timeline for Repairs
Establishing a clear timeline can help keep your repair project on track:
- Emergency Repairs: If you have extensive damage, prioritize immediate repairs to
structural elements.
- Drying Time: Factor in at least 24-48 hours for drying if moisture was present.
- Completion Target: Set realistic goals based on the extent of the damage and the
complexity of the repair.
With the right preparation, you can tackle water damage drywall repair efficiently and effectively.
For more detailed guides on drywall repair, consider checking out Lowe's.
Step-by-Step Water Damage Drywall
Repair Process
Once you've prepared adequately, it's time to tackle the actual repair. Follow these steps for
an effective water damage drywall repair process.
Cutting Out Damaged Drywall
To ensure a successful repair, you must first remove the damaged sections:
- Mark the Area: Use a pencil to outline the affected region, ideally cutting out at least 12
inches beyond visible damage.
- Cut with Precision: Employ a utility knife to make straight cuts along the marked lines.
- Remove the Damaged Piece: Carefully pull away the damaged drywall, being cautious of
any electrical wires or plumbing behind it.
Installing New Drywall Panels
After removing the damaged drywall, it’s time to install new panels:
- Measure and Cut New Panels: Cut new drywall to fit the size of the opening you’ve
created.
- Position the New Panel: Hold the panel in place and secure it using drywall screws,
ensuring it’s flush with the surrounding wall.
- Leave Expansion Gaps: Ensure slight gaps at the edges to allow for expansion and
settling.
Taping and Mudding Seams
Sealing seams is crucial for a smooth finish:
- Apply Drywall Tape: Lay drywall tape along the seams where the new panel meets
existing drywall.
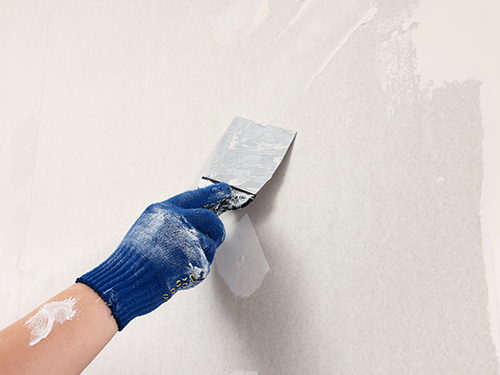
- Spread Joint Compound: Use a taping knife to apply joint compound over the tape
and seams. Aim for a thin, even layer to fill any gaps.
- Feather the Edges: Smooth the compound outwards to blend with the surrounding wall.
Sanding and Finishing
Once the joint compound is dry, you'll need to prepare the surface for painting:
- Sand the Surface: Utilize fine-grit sandpaper to smooth out any imperfections. Wear a
mask to avoid inhaling dust.
- Inspect for Smoothness: Check that the surface is even and paint-ready; apply
additional compound and sand again if necessary.
- Prime and Paint: Finally, prime the area and apply a matching paint to restore the wall’s
appearance.
By carefully following these steps, you can efficiently complete your water damage drywall repair
and restore your walls to their original condition. For additional tips and resources on DIY repairs,
visit Home Improvement Solutions.
Helpful Tips for Successful Water Damage Drywall Repair
Completing a successful water damage drywall repair requires attention to detail and some
insider knowledge. Here are some essential tips to ensure your project goes smoothly.
Choosing the Right Drywall Type
Selecting the appropriate drywall can make a significant difference in durability:
- Standard Drywall: Suitable for most indoor areas, but not ideal for humid spaces.
- Moisture-Resistant Drywall: Known as green board, this type is perfect for bathrooms
and kitchens where moisture exposure is frequent.
- Fire-Resistant Drywall: In areas close to heat sources, this option provides added safety.
Avoiding Common Mistakes
Being aware of common pitfalls can save you time and frustration:
- Skipping the Drying Stage: Ensure the area is completely dry before proceeding with
installation to prevent further damage.
- Ignoring Existing Mold: Always properly handle and remediate any mold before starting
repairs to ensure safety and effectiveness.
- Applying Too Much Joint Compound: Use thin layers of joint compound to prevent
cracking; several light applications are better than one thick layer.
When to Call Professionals
Certain situations might require professional intervention:
- Extensive Damage: If the damage covers a large area or affects structural components,
it's best to seek expert help.
- Mold Issues: If significant mold growth is present, professional remediation is
recommended for safety.
- Insurance Claims: If you're filing an insurance claim, professionals can help navigate
the process and document the damage appropriately.
By keeping these tips in mind, you can enhance your chances of a successful water damage
drywall repair. For more resources and guidance, check out Menards.
Preventing Future Water Damage to Drywall
To protect against future water damage, taking proactive measures is essential. Here are some
strategies to help maintain the integrity of your drywall.
Routine Inspections for Vulnerable Areas
Regularly checking specific areas can catch potential problems before they escalate:
- Attics and Basements: Inspect for signs of leaks, condensation, or mold growth.
- Around Windows and Doors: Examine seals and check for any warping that may
indicate water intrusion.
- Plumbing Fixtures: Check under sinks and around water pipelines for leaks or moisture.
Proper Home Maintenance Practices
Implementing routine maintenance can prevent moisture buildup and damage:
- Gutters and Downspouts: Ensure they are clear and properly directing water away
from your home’s foundation.
- Roof Inspections: Regularly check for missing or damaged shingles that could lead
to leaks.
- Ventilation: Maintain proper airflow in areas prone to moisture, such as bathrooms
and kitchens, by using exhaust fans.
Investing in Water-Resistant Materials
Consider using materials designed to resist moisture:
- Water-Resistant Drywall: Opt for moisture-resistant options like green board in
high-humidity areas.
- Sealants: Apply waterproof sealants to exterior walls to minimize moisture
penetration.
- Vapor Barriers: Installing vapor barriers in basements and crawl spaces can help
prevent moisture migration.
By being proactive with these prevention strategies, you can significantly reduce the risk of
water damage and the need for drywall repair in the future. For more tips on home
improvement and maintenance, visit Lowe's.
Conclusion: The Importance of Timely
Water Damage Drywall Repair
Addressing water damage promptly is crucial for maintaining the structural integrity of your
home and ensuring a healthy living environment. Delaying repairs can lead to further
complications, including mold growth and increased repair costs.
Recap of Key Points
Throughout this guide, we have outlined critical information regarding water damage drywall
repair, including:
- Understanding the causes and signs of water damage.
- Immediate safety measures and steps to take after discovering damage.
- A step-by-step process for repairing drywall effectively.
- Preventative measures to reduce the risk of future damage.
Encouragement to Act Promptly
If you notice signs of water damage, do not hesitate to take action. Evaluate the extent of the
damage and consider whether you can manage the repairs yourself or if professional help is
necessary. Remember that the sooner you address water damage, the less likely you are to
encounter more severe issues down the line.
For reliable supplies and additional resources on home repair, you can visit Menards. Taking
the initiative to repair water damage not only protects your home’s value but also contributes
to a safe and healthy living space for you and your family.
What are the signs of water damage on drywall?
Signs of water damage on drywall include discoloration, such as yellow or brown stains,
bubbling or peeling paint, and physical changes like warping or buckling. You may also notice a
musty smell, which can indicate the presence of mold, especially in areas with high moisture
levels.
How can I prevent water damage to my drywall?
To prevent water damage to your drywall, regularly inspect vulnerable areas such as attics,
basements, and around plumbing fixtures. Ensure proper roof maintenance, clear gutters, and
downspouts to direct water away from your home, and improve ventilation in humid areas like
bathrooms and kitchens.
Can I repair water-damaged drywall myself?
Yes, you can repair water-damaged drywall yourself if you are comfortable with basic home
improvement tasks. Be sure to wear protective gear and follow the proper steps for cutting
out damaged sections, installing new drywall, taping, and applying joint compound. However,
if the damage is extensive or involves mold, it's best to consult a professional.
How long does it take for drywall to dry out after water damage?
The drying time for drywall after water damage varies depending on the severity of the damage
and the environmental conditions. In general, it may take anywhere from 24 to 48 hours for the
drywall to completely dry. Using fans and dehumidifiers can expedite this process.
When should I call a professional for water damage drywall repair?
You should call a professional for water damage drywall repair if the damage is extensive, if you
notice significant mold growth, or if the repairs involve structural elements of your home.
Professionals can provide the expertise and equipment needed to ensure safe and effective
remediation.
Quick and Effective Water Damage Drywall Repair with The Patch Guyz
Dealing with water-damaged drywall can be overwhelming, but with the right approach, you can
restore your walls quickly and effectively. The Patch Guyz recommends removing any wet
insulation and cutting away the damaged drywall to prevent mold growth. Once the area is dry,
replace the damaged sections with fresh drywall, ensuring the seams are properly sealed. For
best results, use moisture-resistant materials and apply a mold inhibitor to the new drywall. If the
job feels too overwhelming, our team of experts at The Patch Guyz is always here to handle the
repair, ensuring long-lasting results and peace of mind.

Related Articles
Ultimate Guide: How To Repair Textured Walls Like A Pro
Ultimate Guide: How to Repair Textured Walls Like a Pro Textured walls have become a defining feature in countless homes across Southeastern Michigan,…