Cost Effective Drywall Installation Tips (1)
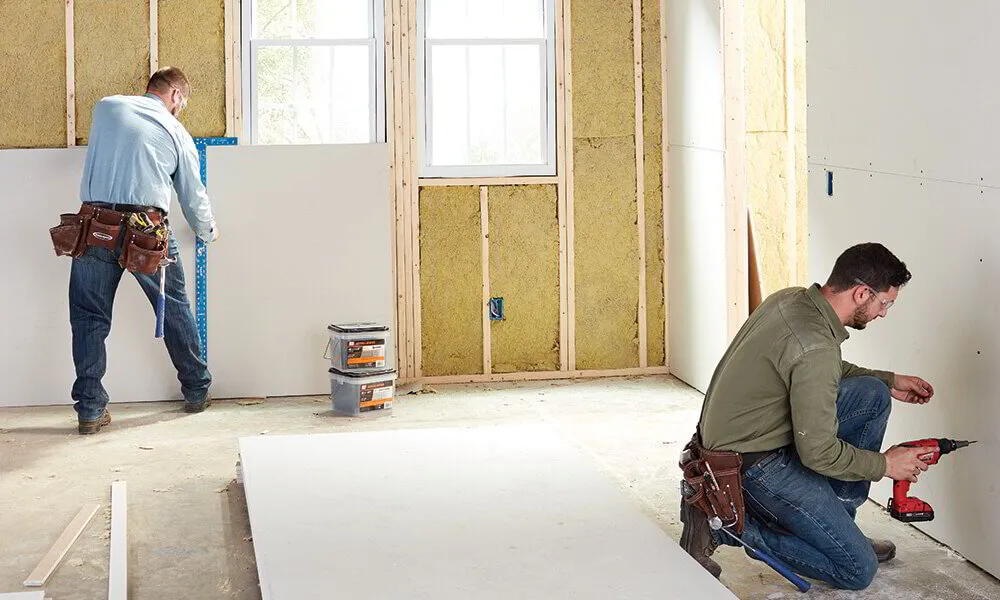
Cost-effective drywall installation can be a game-changer for homeowners looking to enhance
their living spaces without breaking the bank. Did you know that drywall is one of the most
cost-efficient materials for wall construction, offering durability and versatility at an affordable
price? Whether you're renovating an older home or building a new one, understanding the ins
and outs of drywall installation can save you money while elevating your interior aesthetics. In
this blog post, we will explore essential tips, common pitfalls to avoid, and effective strategies for
achieving a professional finish—all aimed at ensuring your drywall project is both
budget-friendly and high-quality. Get ready to dive into a comprehensive guide that will empower
you to make informed decisions for your next drywall installation!
Understanding the Importance of
Cost-Effective Drywall Installation
When embarking on a remodeling project, the importance of cost-effective drywall installation
cannot be overstated. Implementing a strategic approach not only helps manage your budget
but also enhances the overall value of your home. Cost-effective practices allow you to achieve
a professional finish without the premium price tag associated with high-end renovations.
Benefits of Choosing Cost-Effective Solutions
1. Budget Control: By focusing on cost-effective drywall installation, homeowners can
allocate funds more strategically, covering other essential renovations.
2. Value Addition: A well-executed drywall installation can significantly increase property
value, making it a worthwhile investment.
3. Reduced Downtime: Efficient installation methods typically lead to quicker project
completion. This means less disruption to your daily life.
Common Challenges in Drywall Installation
Understanding the challenges in drywall installation is crucial for effectively managing costs.
Below are common issues that can lead to unexpected expenses:
- Inaccurate Measurements: Poor measurements can cause material waste or the need
for additional purchases.
- Improper Techniques: Incorrect installation methods may lead to costly repairs down the
line.
- Ignoring Water Damage: Existing water damage should be addressed before starting the
installation, as it can escalate repair costs if neglected.
Planning Your Drywall Project Efficiently
A well-thought-out plan is pivotal for cost-effective drywall installation. Here are steps to prepare:
Assessing the Scope of the Project
Determine the specific areas where drywall needs to be installed or repaired. This may include:
- Walls
- Ceilings
- Partitions
Creating a Realistic Budget
Include all potential expenses, such as:
- Material costs
- Labor costs (if applicable)
- Tools and equipment rentals
Proper Timeline Estimation
Set reasonable timelines for each project phase to prevent delays that could increase costs.
Selecting Affordable Drywall Materials
When it comes to materials, choosing the right type of drywall can significantly impact your
overall budget. Consider these options:
- Standard Drywall: An affordable choice for most interior walls.
- Moisture-Resistant Drywall: Ideal for bathrooms and kitchens; while slightly more
expensive, they prevent future costs from water damage.
- Soundproof Drywall: A bit pricier, but could save you money on energy bills and
enhance the living experience in noisy environments.
For further guidance on drywall options, check out USG's extensive catalog on drywall products.
DIY vs. Professional Installation: Weighing
the Costs
Deciding between DIY installation and hiring professionals is vital. Here’s how to evaluate both:
Benefits of DIY Drywall Installation
- Cost Savings: You save on labor costs.
- Skill Development: Learn valuable home renovation skills.
- Control Over the Project: You dictate the schedule and materials.
When to Hire Professionals
- Complex Projects: Large-scale renovations or complex layouts may require expert skills.
- Time Constraints: If you’re on a tight schedule, hiring professionals can expedite the
process.
By considering these aspects, you can make informed decisions that contribute to a
cost-effective drywall installation that meets your needs and preferences.
Tips for Reducing Labor Costs
Labor costs can significantly impact the overall budget of a drywall installation project. However, implementing strategic approaches can help you achieve cost-effective drywall installation while
ensuring quality results. Below are some effective strategies to consider:
Efficient Workflow Strategies
Streamlining the workflow can help reduce labor costs. Here’s how:
- Plan Tasks Sequentially: Group similar tasks to avoid downtime between different
phases of installation.
- Create a Checklist: A detailed checklist can help keep track of all materials and tools
needed, minimizing delays caused by forgotten items.
Tools That Save Time and Money
Investing in the right tools can make installation more efficient and ultimately cost-effective.
Consider using:
- Drywall Lifts: These devices assist in raising large sheets of drywall, making installation
quicker and reducing the risk of injury.
- Cordless Screwdrivers: These save time and effort compared to manual screwdrivers.
- Tape Measure and T-square: These help ensure accurate measurements, reducing
waste and correction time.
Collaborating with Professionals for Better Pricing
If you decide to hire professionals, effective collaboration can lead to cost savings. Here are
some tips:
- Get Multiple Quotes: Always compare bids from different contractors to find the best
rate.
- Negotiate: Don’t hesitate to discuss your budget and see if contractors can offer
discounts for bulk work or referrals.
- Schedule in Off-Peak Times: If possible, arrange your project during off-peak seasons
when contractors may lower their rates for jobs.
By implementing these tips, you can significantly reduce labor costs associated with your
drywall installation while still achieving a professional finish.
Maximizing Energy Efficiency in Your
Drywall Installation
In addition to saving on upfront costs, focusing on energy efficiency during your drywall
installation can lead to long-term savings. Here’s how to approach it:
Using Insulation Effectively
Insulating effectively along with drywall installation can enhance energy efficiency. Consider
these options:
- Fiberglass Batts: These are cost-effective and commonly used to insulate walls.
- Foam Board Insulation: While more expensive, it provides better thermal resistance and
can save on heating and cooling costs over time.
Regular Maintenance Practices to Prevent Costly Repairs
Once your drywall is installed, regular maintenance can prevent future expenses. Here are
some maintenance tips:
- Check for Moisture: Regularly inspect areas prone to water damage.
- Address Cracks Promptly: Small cracks can lead to bigger issues if not addressed early.
- Painting: Use high-quality, moisture-resistant paint to protect drywall from wear and tear.
For more information on how efficient insulation can save money, you can visit Energy Star’s
website for comprehensive resources and guidelines.
By focusing on labor costs and long-term energy efficiency, you can achieve a cost-effective
drywall installation that not only fits your budget but also improves the durability and comfort of
your living space.
Final Touches: Affordable Finishing
Options
Once the drywall installation is complete, the finishing touches play a critical role in achieving a
polished look while maintaining a budget. With the right techniques and materials, you can
elevate the interior appearance of your home without overspending.
Cost-Effective Painting and Texturing Ideas
Painting and texturing are vital for protecting and enhancing the aesthetic appeal of your drywall. Here’s how to do it cost-effectively:
Paint Selection
- Choose Quality Paint: While high-quality paint might seem costly upfront, it often
requires fewer coats and provides better coverage, saving money in the long run.
- Use Primer: A good primer can reduce the amount of paint needed for a uniform finish.
- Neutral Colors: Lighter, neutral colors can make spaces appear larger and brighter while
offering a versatile palette for decorating.
Texturing Options
- Knockdown Texture: This technique requires minimal materials and can be an effective
way to hide imperfections in the drywall surface.
- Skip Trowel: This method creates a unique look and can mask minor flaws, offering a
distinct texture with minimal material usage.
Choosing Finishes that Enhance Value Without Breaking the Bank
Select finishing touches that not only beautify but also add value to your space. Consider the
following:
- Crown Molding: Adding affordable crown molding can give a sophisticated appearance
to your rooms.
- Baseboards: Upgrading baseboards enhances the overall finish of your drywall
installation.
- Accent Walls: Create a focal point using paint or wallpaper on one wall to add interest
without needing to remodel an entire room.
For more tips and ideas on budget-friendly finishes, check out Sherwin-Williams, a leading
provider of paints and coatings, offering useful resources on selecting the right products for your
project.
By focusing on affordable finishing options, you can achieve a cost-effective drywall installation
that meets your aesthetic desires while remaining budget-friendly. Making informed choices
during this stage will result in a beautiful, durable, and practical living space that you and your
family can enjoy for years to come.
Maintenance and Longevity to Avoid
Future Costs
To ensure that your drywall remains in excellent condition long after the installation, it’s essential
to incorporate proper maintenance routines. This not only preserves the aesthetic appeal but
also helps avoid costly repairs down the line, making your drywall installation truly cost-effective.
Tips for Prolonging the Lifespan of Your Drywall
Implementing regular maintenance can significantly extend the lifespan of your drywall. Here
are some effective strategies:
1. Regular Inspections: Periodically check your drywall for signs of wear, damage, or
moisture. Early detection can prevent more extensive and expensive repairs.
2. Address Water Leaks Promptly: Leaks can lead to water damage that compromises the
integrity of your drywall. Repair leaks immediately and address any mold or mildew
growth.
3. Control Humidity Levels: Keeping indoor humidity levels in check helps prevent issues
such as warping and mold. Utilize dehumidifiers in high-moisture areas such as
bathrooms and basements.
4. Use Quality Paint: A high-quality paint can provide an extra layer of protection against
scuffs, scratches, and moisture, further prolonging the life of your drywall.
Regular Maintenance Practices to Prevent Costly Repairs
In addition to routine inspections, maintain your drywall through the following practices:
- Touch Up Paint: Whenever you notice scuffs or stains, perform touch-ups to maintain a
clean appearance and avoid larger repainting jobs later.
- Repair Small Cracks Early: Use spackle or joint compound to fill in any minor cracks
promptly.
- Schedule Professional Inspections: Consider hiring a professional to conduct detailed
inspections every few years for peace of mind.
By following these maintenance tips, you can significantly reduce the risk of costly repairs,
keeping your cost-effective drywall installation intact and visually appealing.
For more detailed maintenance tips and guidance, visit Home Depot, a trusted resource for
home improvement and repair products, where you can find additional information on drywall
care.
In conclusion, maintaining your drywall effectively not only enhances the beauty of your home
but also ensures that your investment in a cost-effective drywall installation pays off in the long
run.
Conclusion: Achieving Cost-Effective
Drywall Installation Success
In summary, a cost-effective drywall installation requires thoughtful planning, resourceful
material selection, and ongoing maintenance. By adopting the strategies outlined in this article,
you can not only reduce your initial expenses but also ensure long-term value for your
investment.
Key Takeaways for Cost-Effective Drywall Installation
Planning is Crucial: Establish a clear scope, budget, and timeline before starting your
drywall project.
- Choose the Right Materials: Opt for affordable yet quality drywall types that suit your
specific needs to minimize future expenses.
- Consider Labor Wisely: Weigh the pros and cons of DIY versus hiring professionals, and
seek out skilled labor at reasonable rates when necessary.
- Emphasize Finishing Touches: Affordable painting and texturing can significantly
enhance your space's appearance without straining your budget.
- Maintain Regularly: Implementing maintenance routines can prolong the lifespan of your
drywall, preventing costly repairs in the future.
Ultimately, making informed choices throughout the process will allow you to achieve a beautiful
installation that complements your home while maintaining financial prudence.
For additional resources and product recommendations, consider visiting Lowes, a reliable
source for home improvement materials, where you can find everything needed for successful
drywall projects.
By prioritizing cost-effectiveness, you'll create a space that is not only aesthetically pleasing but
also durable and efficient, ensuring your home remains a haven of comfort and quality for years
to come.
Essential Tools for Successful Drywall
Installation
Proper tools are integral to achieving a cost-effective drywall installation. The right equipment
not only speeds up the process but also enhances the quality of the finish. Here’s a breakdown
of essential tools you’ll need to complete your drywall project efficiently.
Key Tools for Drywall Installation
1. Drywall Lift:
○ Ideal for raising large sheets of drywall against walls or ceilings, a drywall lift
minimizes labor strain and provides a stable platform.
2. Utility Knife:
○ A sharp utility knife is essential for cutting drywall sheets with precision. Ensure that
you have replacement blades handy for best results.
3. T-Square or Framing Square:
○ These tools help ensure accurate measurements and straight cuts, which are
crucial for fitting drywall properly.
4. Drill and Screw Gun:
○ A cordless drill or screw gun is necessary for fastening drywall to studs. Using a
screw gun helps prevent overdriving screws, which can damage the surface.
5. Taping and Finishing Knives:
○ Use a variety of knives in different widths (e.g., 6-inch, 10-inch, and 12-inch) for
applying joint compound and creating smooth seams between drywall sheets.
6. Sandpaper or Pole Sander:
○ After finishing with joint compound, sand the seams and joints for a smooth, even
surface ready for painting.
Additional Accessories to Consider
- Safety Gear: Always wear a dust mask and goggles to protect against drywall dust.
- Measuring Tape: Ensure you measure accurately to avoid material waste.
- Green or Blue Board: If moisture resistance is needed, consider using specialized
drywall for bathrooms and kitchens.
For more guidance on essential tools for your drywall project, you can refer to Home Depot's
comprehensive tool selection and resources.
Using the right tools is crucial for achieving a successful, cost-effective drywall installation. Initial
investments in quality equipment can lead to better results and reduce overall labor and repair
costs, making your drywall project a delightful and productive experience.
Common Mistakes to Avoid for
Cost-Effective Drywall Installation
Achieving a cost-effective drywall installation involves meticulous planning and execution.
However, mistakes can lead to increased expenses and disappointing results. Recognizing
common pitfalls can help you execute your project more efficiently.
Key Mistakes to Avoid
1. Neglecting to Prepare the Space:
○ Failing to properly clean and prepare the area can result in a poor finished product.
Move furniture, remove existing wall coverings, and repair any underlying issues
like plumbing leaks before beginning.
2. Ignoring Moisture Concerns:
○ Moisture can lead to mold and mildew, compromising the integrity of your drywall.
Be sure to use moisture-resistant drywall in bathrooms and kitchens to prevent
future complications.
3. Skipping the Measurement Step:
○ Inaccurate measurements can lead to excess material waste. Always double-check
your measurements before cutting to ensure a precise fit.
4. Overlooking the Importance of Joint Taping:
○ A common oversight is rushing through or improperly applying joint tape, which can
lead to visible seams. Take your time, apply an even layer of joint compound, and
feather the edges for a seamless appearance.
5. Buying Low-Quality Materials:
○ While it may be tempting to choose inexpensive drywall, low-quality materials can
lead to higher costs down the line due to replacements and repairs. Invest in
materials that balance cost and quality to ensure longevity.
Additional Tips for Success
- Consult Resources: Utilize guides and tutorials from credible sources to better
understand the installation process.
- Seek Professional Help if Needed: If you’re unsure about any aspect of the installation,
consider hiring a professional to ensure a high-quality finish.
For expert advice and quality materials, consider visiting Lowe's, a trusted home improvement
retailer.
By avoiding these common mistakes, you can ensure a cost-effective drywall installation that
meets your expectations while minimizing unnecessary expenses. Focus on careful planning
and execution, and your project will yield excellent results that add value to your home.
Choosing the Right Drywall for
Cost-Effective Installation
Selecting the correct type of drywall is a crucial component of a cost-effective drywall
installation. The variety you choose can significantly influence both the installation process and
the long-term durability of your walls. Here’s what you need to consider.
Types of Drywall to Consider
1. Standard Drywall (Gypsum Board):
○ This is the most commonly used type for interior walls and ceilings.
○ It’s cost-effective, easy to install, and perfect for most rooms in the home.
2. Moisture-Resistant Drywall:
○ Ideal for areas prone to high humidity, such as kitchens and bathrooms.
○ It helps prevent mold growth, reducing the need for expensive repairs in the future.
3. Soundproof Drywall:
○ If noise reduction is a priority, consider soundproof drywall.
○ Although it comes at a higher initial cost, it can save on noise-related disturbances,
offering a more serene living environment.
4. Fire-Resistant Drywall:
○ This type, often referred to as Type X drywall, is designed to resist fire and is
essential for specific applications, such as garages and multi-family housing.
○ Investing in fire-resistant drywall enhances safety and may potentially lower
insurance costs.
Factors to Evaluate When Choosing Drywall
- Cost vs. Benefit: Weigh the upfront costs against the long-term advantages of durability
and maintenance savings.
- Location of Installation: Consider moisture levels, fire risks, and noise exposure in the
selected area.
- Aesthetic Needs: Some drywall types may finish more smoothly or be better for
texturing, impacting the overall appearance of your space.
For further details on drywall options and to find quality materials, visit USG Corporation, a
reputable manufacturer with extensive resources and product information.
By choosing the right type of drywall, you can achieve a cost-effective drywall installation that
meets all your functional and aesthetic needs. Prioritizing quality selections will not only guide
your installation process but will also lead to savings in maintenance and repairs over time.
Timing Your Drywall Installation for
Cost-Effective Results
Timing plays a vital role in achieving a cost-effective drywall installation. Whether you’re doing it
yourself or hiring professionals, the right timing can significantly impact both costs and project
efficiency.
Best Times for Drywall Installation
1. Off-Peak Seasons:
○ Scheduling your project during off-peak seasons, such as late fall or winter, can
result in lower labor costs. Many contractors are more willing to negotiate during
these slower times.
2. Dry Weather Conditions:
○ Aim to install drywall during dry weather as high humidity can affect the installation
and drying time of joint compound. This can lead to costly delays and uneven
finishes.
3. Consider Renovation Phases:
○ Align your drywall installation with other renovation activities. For instance, it makes
sense to install drywall after plumbing, electrical work, and major structural changes
are completed to avoid any unnecessary damage.
Optimizing Your Schedule
- Plan for Finishing Touches:
○ Factor in time for sanding, painting, and any other finishing touches. Allow
adequate drying time for joint compound and paint to ensure a professional
appearance.
- Availability of Help:
○ If you’re embarking on a DIY project, ensure that you have the necessary help
available. Having a team can significantly speed up the installation process and
avoid any costly labor fees associated with hiring professionals.
- Avoid Rush Jobs:
○ Rushing the installation process can lead to mistakes that require costly
corrections. Allow ample time for each phase, ensuring every step is done correctly.
For more tips on scheduling your home improvement projects effectively, consider visiting
Angie's List, which provides a wide range of resources for finding reliable contractors and
maintaining your home.
By timing your drywall installation strategically, you can maximize efficiency and savings,
culminating in a successful and cost-effective drywall installation. Planning ahead not only saves
money but also ensures a smoother process and a better finished product.
Understanding the Different Finishing
Techniques for Cost-Effective Drywall
Installation
After completing the primary drywall installation, the finishing process is essential to achieve a
polished, professional look. Choosing the right finishing techniques not only enhances
aesthetics but also contributes to a cost-effective drywall installation by ensuring lasting
durability.
Popular Finishing Techniques
1. Taping and Mudding:
○ This step involves applying joint tape to the seams between drywall sheets and
covering them with joint compound (mud).
○ Proper taping and mudding are crucial for a smooth surface and to prevent visible
seams once painted.
2. Sanding:
○ Once the joint compound is dry, sanding is necessary to achieve a smooth finish.
○ Use various grits of sandpaper, starting with a coarser grit and progressing to a
finer one for the best results.
3. Texturing:
○ Texturing can add depth and character to your walls. Popular methods include
knockdown, slap brush, and popcorn texture.
○ While texturing requires additional materials and time, it can effectively hide
imperfections, reducing the need for extensive repairs later.
4. Priming and Painting:
○ Applying a primer before painting is essential for enhanced adhesion and color
vibrancy.
○ Choose high-quality paint to boost durability and reduce the need for frequent
repainting.
Tips for Effective Finishing
- Invest in Quality Supplies: Use good-quality joint compound, tape, and paint to minimize
repairs and achieve a professional appearance.
- Take Your Time: Rushed finishing can lead to mistakes that require costly fixes. Allow
each layer to dry fully before proceeding to the next step.
- Consider Hiring a Professional: If unsure about your finishing skills, hiring a
professional can ensure a flawless finish that will ultimately save you money on future
repairs.
For more ideas and guidance on drywall finishing techniques, visit Sherwin-Williams, which
offers extensive resources on paint and finishing options.
With careful attention to the finishing process of your drywall installation, you can achieve a
cost-effective drywall installation that looks polished and lasts for years. Prioritizing quality in
finishing not only enhances the visual appeal but also protects your investment and minimizes
future costs.
What is the average cost of drywall installation?
The average cost of drywall installation varies based on factors like the size of the project, labor
rates in your area, and the type of drywall used. Typically, homeowners can expect to pay
between $1.50 and $3.50 per square foot for materials and installation, with additional costs for
finishing touches.
Can I install drywall myself to save money?
Yes, many homeowners opt for DIY drywall installation to save on labor costs. However, it's
important to have the right tools, materials, and knowledge to ensure a quality finish. Improper
installation can lead to costly repairs down the line, so be sure you're comfortable with the
process before proceeding.
How long does it take to install drywall?
The time it takes to install drywall depends on the size of the area and the experience level of
the installer. On average, a professional crew can install drywall in a standard room in one to
two days, while a DIY project may take longer, especially if it’s your first time handling drywall.
What are the best types of drywall for different rooms?
For general living areas, standard drywall is sufficient. In kitchens and bathrooms where
moisture is a concern, moisture-resistant drywall (often green board) is recommended. For
basements, consider using mold-resistant drywall. If noise reduction is important, soundproof
drywall can be a great investment.
How can I ensure a smooth finish after drywall installation?
To achieve a smooth finish, take your time during the taping and mudding process. Apply joint
compound evenly and feather the edges to minimize seams. Once dry, sand the surface
smoothly before painting. Using quality paint and finishes will also enhance the overall look,
providing a polished appearance.
Budget-Friendly Drywall Installation
Tips from The Patch Guyz
When it comes to drywall installation, The Patch Guyz is here to help you achieve quality
results without the hefty price tag. Start by measuring the area carefully to avoid
over-purchasing materials. Opt for standard drywall sheets for a more affordable solution,
and consider tackling prep work, such as clearing the room and removing old drywall, to
save on labor costs. Use joint compound efficiently by applying thin layers to minimize waste.
With our expert team handling the installation, you’ll avoid costly errors and ensure a smooth,
lasting finish. Trust The Patch Guyz for affordable, professional drywall installation that fits
your budget.
Related Articles
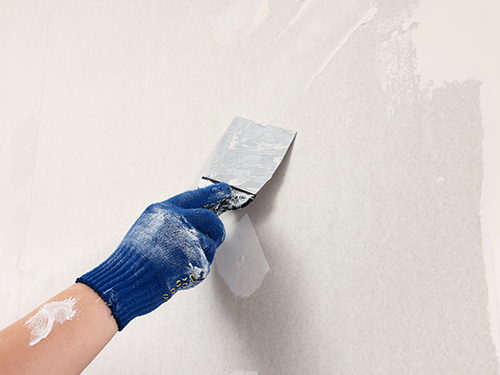
Ultimate Guide: How To Repair Textured Walls Like A Pro
Ultimate Guide: How to Repair Textured Walls Like a Pro Textured walls have become a defining feature in countless homes across Southeastern Michigan,…
The Ultimate Guide to Finding the Best Drywall Repair Services Near You
Finding the Best Drywall Repair Services Near You: A Comprehensive Guide When damage strikes your walls or ceilings, finding reliable repair services …
Flawless Walls: The Complete Guide to Professional Drywall Crack Repair
Expert Guide to Professional Drywall Crack Repair Services Discovering cracks in your drywall can be frustrating, whether you're a homeowner dealing w…