Expert Tips For Fixing Drywall Holes And Cracks Professionally
Fixing drywall holes and cracks professionally is an essential skill for any homeowner, yet many
find themselves unsure of where to start when faced with wall damage. Did you know that even
small, seemingly insignificant holes can lead to more extensive issues if left unchecked?
Whether from everyday wear and tear, a minor mishap, or the gradual effects of moisture,
drywall damage is more common than you might think. Understanding how to address these
problems effectively not only enhances the aesthetic appeal of your home but also helps
maintain its structural integrity. In this guide, we’ll explore expert tips, essential tools, and
step-by-step techniques that will empower you to take on drywall repairs with confidence and
skill.
Understanding Drywall Damage
When it comes to maintaining your home, understanding the types of drywall damage is crucial.
Drywall can easily show signs of wear and tear, which can vary from small holes to significant
cracks and even water damage. Recognizing these issues promptly will help in fixing drywall
holes and cracks professionally.
Types of Drywall Damage
1. Holes:
○ Small holes from nails or screws.
○ Larger holes caused by accidents.
2. Cracks:
○ Hairline cracks that are usually cosmetic.
○ Structural cracks that may indicate deeper issues.
3. Water Damage:
○ Stains or discoloration caused by leaks.
○ Sagging or bulging drywall due to moisture exposure.
Causes of Drywall Damage
Understanding the causes of drywall damage can prevent similar issues in the future. Common
causes include:
- Everyday Wear and Tear: High traffic areas are more likely to experience scuffs and
holes.
- Impact Damage: Furniture, sports activities, or any accidental hits can leave dents or
holes.
- Moisture Exposure: Water leaks can weaken drywall integrity, leading to bubbling or
peeling paint.
By being aware of these factors, homeowners can adopt preventive measures to protect their
drywall.
Tools and Materials Needed
To fix drywall holes and cracks professionally, having the right tools and materials is essential.
Here's a list of what you'll need:
Essential Tools
- Utility knife
- Drywall saw
- Taping knife
- Sanding sponge or block
- Measuring tape
Recommended Materials
- Drywall patching compound
- Drywall tape (mesh or paper)
- Primer and paint
- Joint compound for texture matching
These tools and materials will help ensure your repair work is completed effectively and
efficiently. For a deeper understanding of drywall options and maintenance, check out the
professionals at Lowe's for guidance and supplies.
Preparing the Area
Before diving into repairs, proper preparation is necessary. Follow these steps for an optimal
outcome:
1. Clean the Damaged Area: Remove any loose material surrounding the hole or crack.
2. Assess the Damage: Determine the size and severity of the damage – this will guide
your repair method.
By taking the time to prepare, you'll set the stage for a professional finish and ensure your
repairs last.
Techniques for Fixing Drywall Holes
Arming yourself with the right techniques is key when fixing drywall holes and cracks
professionally. With a step-by-step approach, even the largest damage can be managed
successfully.
Small Holes
- Clean the Area: Use a utility knife to smooth out jagged edges.
- Apply Patch: Fill with compound and smooth it down.
- Sand and Paint: Once dry, sand it smooth and paint over.
Medium to Large Holes
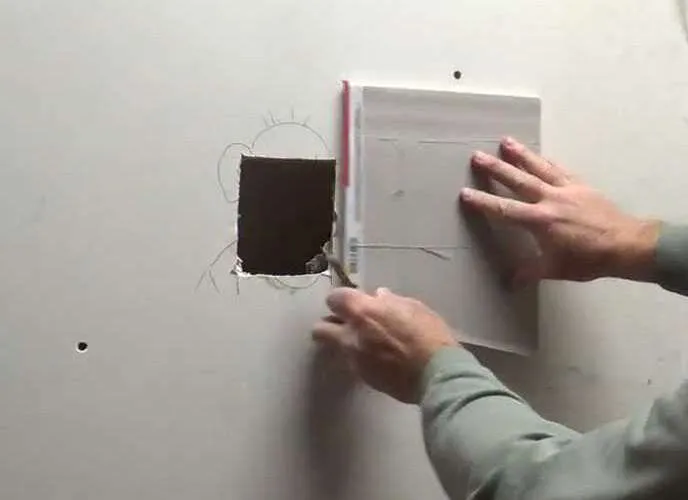
- Cut a Patch: Create a patch from a scrap piece of drywall.
- Secure the Patch: Use drywall screws to attach it firmly.
- Tape and Compound: Use drywall tape around the edges and apply joint compound.
Following these steps will help restore your drywall’s integrity and aesthetics, making it look as
good as new.
Addressing Cracks in Drywall
Ignoring cracks in drywall can lead to more serious issues if left untreated. Whether they are
minor cosmetic flaws or severe structural concerns, understanding how to address these cracks
is essential for maintaining the integrity of your home. By fixing drywall holes and cracks
professionally, you ensure a long-lasting repair and improved aesthetics.
Identifying the Type of Crack
Before starting any repair process, it’s important to identify the type of crack. Different types may
require different handling techniques.
- Hairline Cracks: Usually superficial and often caused by settling or temperature
changes.
- Medium Cracks: More noticeable and can indicate movement within the wall or moisture
issues.
- Structural Cracks: Larger cracks that may suggest significant foundation or structural
problems.
Techniques for Repairing Surface Cracks
For most homeowners, dealing with hairline and medium cracks can be a straightforward
process. Here’s how to do it effectively:
1. Clean the Crack: Remove any debris or loose material along the crack with a utility knife
or sanding sponge.
2. Fill the Crack: Apply a lightweight spackling compound using a putty knife, ensuring you
push the compound deep into the crack.
3. Smooth the Surface: Once filled, smooth the surface with the putty knife, feathering the
edges to blend with the surrounding area.
4. Sand and Finish: After the compound dries, lightly sand the area until smooth. Apply a
coat of primer and paint to match the surrounding wall.
By following these steps, you can effectively handle surface cracks and maintain the
appearance of your walls.
Dealing with Deeper Structural Cracks
When it comes to structural cracks, the approach requires more caution and knowledge. These
cracks may indicate underlying issues that need to be addressed immediately:
- Consult a Professional: For significant cracks, it’s often best to hire a professional who
specializes in drywall repair and structural issues.
- Assess the Cause: A professional can help determine whether the crack is from settling,
moisture, or other structural concerns, and advise on necessary repairs.
Preventing Future Cracks
To minimize future cracking and the need for fixing drywall holes and cracks professionally,
consider the following preventive measures:
- Control Humidity: Use a dehumidifier in damp areas to reduce moisture buildup.
- Monitor Settling: Regularly check for any new signs of cracking, especially after changes
in weather.
- Choose Quality Materials: When installing or repairing drywall, use high-quality
materials that can withstand environmental changes.
By being proactive, you can save time and money while ensuring your drywall remains in
excellent condition.
Applying Finishing Touches
Once you've successfully addressed the holes and cracks in your drywall, applying the finishing
touches is crucial to achieving a professional look. This step is often overlooked but can
significantly enhance the overall appearance of your repairs. By effectively applying these
techniques, you'll ensure that fixing drywall holes and cracks professionally results in a
seamless integration with the rest of your walls.
Sanding and Smoothing the Repaired Area
After the patching compound has dried, the next step is to sand it down for a smooth finish.
Here’s how to do it correctly:
1. Use the Right Sanding Tools: A sanding sponge or a fine-grit sanding block will provide
the best results. Avoid using coarse sandpaper, as it can create uneven surfaces.
2. Sand in Circular Motions: Gently sand over the repaired area in circular motions until
the surface feels smooth and flush with the surrounding drywall.
3. Check for Imperfections: After sanding, inspect the area for any remaining
imperfections. If necessary, apply an additional layer of compound, let it dry, and sand
again.
Choosing the Right Paint and Texture
To blend the repaired area seamlessly with the existing wall, selecting the right paint and texture
is vital.
- Primer: Always apply a primer before painting. This helps the paint adhere better and
ensures uniform coverage.
- Matching Paint: Select a paint color that closely matches the surrounding areas. Take a
sample to your local hardware store for a precise match.
- Texturing Methods: Depending on your wall's finish, you may need to reapply a texture.
Common texturing techniques include:
- Knockdown Texture: Apply a thin layer of joint compound, allowing it to partially dry
before knocking it down with a knife or trowel.
- Sand Texture: Spray on a texture coating and let it dry before painting.
Tips for a Professional Finish
To guarantee a polished and professional outcome, keep these tips in mind:
- Take Your Time: Rushing the process can lead to mistakes that require additional
repairs.
- Layering: For larger areas, consider applying multiple thin layers of compound rather
than one thick layer to prevent cracking.
- Patience is Key: Allow each layer of compound and paint to dry completely before
proceeding to the next step.
For more comprehensive advice on painting and finishing, check out Home Depot's painting
guides to ensure you have all the information you need for a successful project.
By focusing on these final steps when fixing drywall holes and cracks professionally, you will
achieve a high-quality repair that not only meets your standards but also enhances the beauty
of your home.
Preventative Measures for Future Damage
To minimize the likelihood of needing to invest time and resources in fixing drywall holes and
cracks professionally, implementing preventative measures in and around your home is crucial.
Proactive steps can help protect your walls from damage caused by various factors such as
moisture, impact, and general wear and tear.
Tips for Protecting Your Drywall
1. Use Corner Guards: These protective strips help shield drywall in high-traffic areas,
especially around door frames and hallways, where impacts are more likely to occur.
2. Maintain Humidity Levels: Keep your home’s humidity regulated. Use dehumidifiers in
basements and bathrooms to prevent moisture buildup that can weaken drywall integrity.
3. Inspect for Leaks: Regularly check plumbing and appliances for leaks. Early detection
can save you from extensive drywall repairs due to water damage.
4. Avoid Heavy Objects on Walls: Be mindful of what you hang on your walls. Heavy
frames or mirrors should be secured properly to prevent falling and causing damage.
5. Use Proper Anchors for Hanging Items: When hanging shelves or artwork, use wall
anchors appropriate for the weight of the objects. This reduces the risk of creating holes
during installation.
Common Maintenance Practices
In addition to protective measures, regular maintenance can help reduce the likelihood of
drywall damage:
- Routine Inspections: Periodically examine your drywall for early signs of cracks or leaks.
- Prompt Repairs: Address any damage immediately to prevent it from worsening.
- Control Temperature Fluctuations: Keep your home’s temperature stable to avoid
expansion and contraction of drywall.
Adopting these preventative strategies can significantly extend the life of your drywall and save
you future hassles. For further guidance on home maintenance, you can find resources at
Lowe's Home Improvement.
By taking proactive steps today, you can prevent the frustrating cycle of fixing drywall holes and
cracks professionally in the future, ensuring a safer and more stable home environment.
When to Call a Professional
While many homeowners can handle minor drywall repairs, there are times when fixing drywall
holes and cracks professionally is the best option. Recognizing when to seek help from an
expert can save you time, effort, and potentially costly mistakes.
Signs That Indicate a Need for Expert Help
- Extensive Damage: If the hole or crack is larger than a few inches, or if multiple areas
need repairs, it may be best to consult a professional.
- Structural Issues: If you suspect that the cracks are due to foundational problems or
shifts in the building structure, it’s critical to seek professional assessment and repair.
- Water Damage: Persistent water damage that causes sagging, discoloration, or mold
growth should be handled by experts who can also identify and remedy the source of the
moisture.
- Complex Texture Matching: Achieving an exact match in texture and paint color can be
challenging. If your drywall has a unique finish, a professional can ensure a perfect blend.
Benefits of Hiring Professionals
Choosing to hire a professional drywall repair service offers several advantages:
- Expertise: Professionals have extensive knowledge and experience in drywall repair,
including identifying underlying issues.
- Quality Materials: They will use high-quality materials suited for your specific needs,
ensuring durability.
- Time-Saving: Professionals can complete repairs efficiently, allowing you to focus on
other tasks.
- Warranty and Support: Many professionals offer warranties on their work, providing
peace of mind for future repairs.
For large projects or when in doubt about the approach to take, consider reaching out to
experts. To explore more about drywall services, check out The Home Depot’s contractor
services for reliable options near you.
By understanding when to call a professional, you can make informed decisions that safeguard
your home and ensure repairs are done correctly, aiding in the ongoing challenge of fixing
drywall holes and cracks professionally.
Conclusion
In conclusion, mastering the art of fixing drywall holes and cracks professionally not only
enhances the functionality of your home but also improves its aesthetic appeal. Understanding
the types of drywall damage, utilizing the right tools, and applying proper techniques is essential
for effective repairs.
Key Takeaways
Identify Damage Early: Recognize different types of drywall damage and address them
promptly to prevent further issues.
- Use Quality Materials: Invest in high-quality tools and materials for lasting repairs.
- Prepare Thoroughly: Proper preparation of the damaged area sets the foundation for a
professional finish.
- Apply Finishing Touches: Don’t overlook sanding and painting, as these steps are
crucial to achieving a seamless repair.
- Know Your Limits: Understand when it’s time to call professionals, especially for
extensive or complicated repairs.
By implementing these strategies, you not only ensure the longevity of your repairs but also
enhance the overall aesthetic of your space. Taking proactive measures can mitigate future
damage and keep your drywall looking its best.
For more detailed information on drywall care, consider visiting Lowe's Home Improvement for
resources and products to help maintain your home effectively.
With the knowledge and tools at your disposal, you're well-equipped to tackle drywall repairs,
ensuring your home remains a beautiful and welcoming environment.
Additional Resources for Drywall Repair
To further enhance your skills and ensure you're prepared for any drywall repair project,
leveraging additional resources can be invaluable. From video tutorials to professional advice,
having the right information can make fixing drywall holes and cracks professionally a more
manageable task.
Online Tutorials and Guides
1. YouTube DIY Channels: Search for renovation and repair channels that specialize in
drywall work. You'll find a plethora of video tutorials demonstrating techniques in real-time.
2. Home Improvement Websites: Many reputable home improvement websites offer
step-by-step guides, tips, and articles focused on drywall repair. These resources often
include photos and diagrams to aid comprehension.
3. Manufacturer Resources: Check the websites of drywall manufacturers for
product-specific instructions and best practices. These resources often provide guidance
tailored to the materials you are using.
Community Forums and Support
- Home Repair Forums: Joining online communities such as Reddit's r/Home Improvement
or other DIY forums allows you to ask questions, share experiences, and learn from
others who have tackled similar projects.
- Local Workshops: Many home improvement stores, such as The Home Depot, offer
workshops on various DIY topics, including drywall repair. These hands-on sessions can
provide valuable skills and insights directly from experts.
Conclusion
Taking advantage of these resources can empower you to feel confident when tackling drywall
repairs. Whether you are a seasoned DIYer or new to home maintenance, understanding the
various methods and knowing where to find supportive resources will enhance your ability to
handle fixing drywall holes and cracks professionally. With the right knowledge and tools, you
can achieve high-quality repairs that maintain the integrity and appearance of your home.
Expert Tips for Maintaining Drywall
Proper maintenance of your drywall can significantly reduce the need for ongoing repairs and
help avoid extensive damage. By taking proactive steps, you can keep your walls looking great
and minimize the chances of holes and cracks developing. Here are some expert tips for
maintaining drywall that will allow homeowners to feel confident in fixing drywall holes and
cracks professionally when the need arises.
Regular Inspection
Regularly inspecting your home’s drywall can help you catch minor issues before they turn into
larger problems. Consider the following:
- Check for Cracks and Holes: Look for new cracks or holes, particularly in high-traffic
areas or around door frames and windows.
- Monitor for Water Damage: Pay attention to any stains or discoloration that may indicate
leaks from plumbing or roof issues.
- Evaluate Humidity Levels: High humidity can lead to mold and mildew on drywall, so
check for signs in bathrooms and basements.
Routine Cleaning
Maintaining cleanliness on your drywall helps prevent dirty spots and stains that may require
repair later on. Follow these tips:
- Dust Regularly: Use a microfiber cloth or duster to eliminate dust and cobwebs from the
walls.
- Wipe Stains Immediately: Clean up any spills or stains promptly using a mild detergent
and water to prevent them from setting in.
- Avoid Abrasive Cleaners: Stick to gentle cleaners to avoid damaging the surface of the
drywall.
Protective Measures
Implementing protective measures can safeguard your drywall against damage:
- Utilize Corner Protectors: Install corner guards in high-traffic areas to protect against
impacts and scuffs.
- Use Humidifiers: In areas prone to moisture, such as basements, a humidifier can help
control humidity levels, preventing sagging and damage.
Final Thoughts
By following these expert tips for maintaining drywall, you can reduce the likelihood of damage
and minimize the need for fixing drywall holes and cracks professionally. When you stay on top
of maintenance, you help ensure that your walls remain in excellent condition and keep your
home looking its best.
For further resources on drywall care and maintenance, check out Lowe's for DIY tips and
product recommendations to support your ongoing home improvement efforts.
Final Considerations for Successful
Drywall Repair
As you embark on the journey of fixing drywall holes and cracks professionally, it’s essential to
summarize the key strategies and considerations that will lead to successful repairs. Being
informed and prepared can make all the difference in achieving a seamless finish and
maintaining your home's integrity.
Essential Strategies for Efficient Repairs
Assessment is Key: Before starting any repair, accurately assess the damage type and
size. This will help inform your choice of tools and materials needed for the job.
- Prioritize Preparation: Thoroughly clean and prepare the damaged area. Proper
preparation is crucial for ensuring that your repairs are effective and long-lasting.
- Choose Quality Materials: Invest in high-quality drywall patches, compounds, and
toolsets to achieve professional results. The old saying "you get what you pay for" holds
true in home repairs.
- Follow Proper Techniques: Adhere to proven methods for filling holes and addressing
cracks to ensure the best results. Improper techniques may lead to rework and additional
costs.
Frequently Asked Questions
- How long does it take for repair compounds to dry? Generally, most patches will dry
within 24 hours, but it can vary based on product instructions and environmental
conditions.
- Can I paint immediately after applying a patch? It’s essential to allow the patch and
primer to dry completely before painting to avoid any issues with adhesion and finish.
- What if I notice more damage? If you discover additional damage while repairing, don't
hesitate to consult with a professional for a thorough assessment and resolution.
Resources for Further Assistance
If you're feeling overwhelmed or unsure about any aspects of drywall repair, numerous online
resources can aid you. Websites like Home Depot offer extensive guides, videos, and tips for
DIY drywall repairs.
By combining these considerations with your desire to maintain your home, you’ll be
well-equipped to tackle the process of fixing drywall holes and cracks professionally, enhancing
the quality and longevity of your living spaces. Remember, a little knowledge goes a long way,
and each small repair contributes to the overall beauty of your home.
What materials do I need for fixing drywall holes and cracks
professionally?
To effectively fix drywall holes and cracks, you will need several essential materials such as
drywall patches, joint compound, drywall tape (either paper or mesh), sandpaper or a sanding
sponge, a putty knife, and a utility knife. Additionally, having primer and paint to finish the repair
is crucial for a seamless look.
How do I know if the damage is too severe to repair myself?
If you discover extensive damage in your drywall, such as large holes, multiple cracks, or signs
of water damage, it may be wise to consult a professional. Indicators of severe damage include
significant sagging, mold or mildew, and cracks that are wider than 1/8 inch. Always err on the
side of caution when structural integrity is concerned.
How long does it take for drywall repair compound to dry?
Drying times for drywall repair compounds can vary based on factors such as humidity and
temperature. Typically, most compounds will dry within 24 hours under normal conditions. For
best results, check the product label for specific drying times and recommendations before
proceeding to painting.
Can I paint over a patched area right away?
It's essential to allow the patched area to fully dry before painting. Generally, this means waiting
until the joint compound is completely dried and any primer has been applied and dried as well.
Painting too soon can lead to peeling, bubbling, or an uneven finish, detracting from your repair
efforts.
What should I do to prevent future drywall damage?
To prevent future drywall damage, implement preventive measures like regularly checking for
leaks around plumbing fixtures, controlling humidity levels in areas prone to moisture, and using
corner guards in high-traffic areas. Additionally, be cautious when hanging items and always use
appropriate anchors to minimize the risk of damage.
Professional Tips for Fixing Drywall Holes and
Cracks by The Patch Guyz
Fixing drywall holes and cracks professionally requires skill and the right approach, and The Patch
Guyz is here to offer expert guidance for a seamless result. Begin by cleaning the damaged area
thoroughly, then apply a patch or joint compound to fill the hole or crack. For larger areas, consider
using a drywall repair patch or mesh tape for added strength. Smooth the compound with a putty
knife and, once it’s dry, sand it down to ensure an even surface. Finish by priming and painting to
match the rest of the wall. For flawless repairs and long-lasting results, trust The Patch Guyz to
restore your drywall with precision and care.

Related Articles
Reliable Drywall Repair Technicians Near Detroit
When it comes to maintaining your home, finding reliable drywall repair technicians near Detroit is essential for ensuring the integrity and appearanc…