Cost Effective Drywall Installation Tips (3)
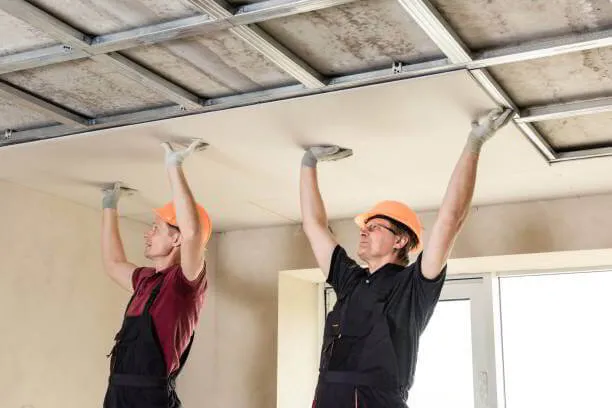
Cost-effective drywall installation is an essential aspect of home renovation that can save you
both time and money while enhancing the overall look of your space. Did you know that
improperly installed drywall can lead to costly repairs and a decrease in your home’s value?
With the right techniques and strategies, you can achieve professional results without breaking
the bank. This comprehensive guide will take you through everything you need to know, from
planning and material selection to installation and finishing, ensuring that your drywall project is
not only budget-friendly but also long-lasting and visually appealing. Whether you're a DIY
enthusiast or looking to hire professionals, these practical tips will help you navigate the process
with confidence.
Understanding Cost-Effective Drywall
Installation
What is Cost-Effective Drywall Installation? Cost-effective drywall installation refers to strategies
and practices that minimize expenses while ensuring quality in drywall projects. This approach
balances budget constraints with the need for durable and visually appealing results.
Benefits of Choosing Cost-Effective Solutions
- Saves Money: Implementing cost-effective techniques can significantly reduce the overall
project cost.
- Improves Efficiency: Streamlined processes mean less time spent on installation,
resulting in reduced labor costs.
- Enhances Quality: When done right, cost-effective solutions don't compromise on
quality; they optimize resources instead.
Planning Your Drywall Project
Assessing Your Needs Before starting your drywall installation, assessing your specific needs is
crucial. Are you managing a large-scale remodeling job or simply patching up a few holes?
Understanding your project's scope will help define your budget and material requirements.
Creating a Budget A clear budget is vital when aiming for cost-effective drywall installation.
Consider including the following in your budget:
- Materials costs (drywall panels, tape, mud, etc.)
- Labor (if hiring professionals)
- Tools and equipment (if DIY)
- Contingency funds for unexpected expenses
Timing Your Project Choosing the right time to undertake your drywall installation can lead to
savings. For instance, avoiding peak seasons can help you secure better material prices and
potentially lower labor costs.
Selecting the Right Materials
Types of Drywall Panels There are several types of drywall panels available, each with specific
benefits:
- Standard Drywall: Commonly used for interior walls, cost-effective but not moisture
resistant.
- Moisture-Resistant Drywall: Ideal for bathrooms and kitchens, costs more but protects
against water damage.
- Soundproof Drywall: Useful for shared walls, typically more expensive but can add value
in the long run.
Cost-Effective Alternatives Look for budget-friendly alternatives such as:
- Buying bulk materials
- Consulting local wholesalers for discounts
- Choosing less expensive brands while ensuring they meet standards
Importance of Quality No matter how cost-effective your installation is, using subpar materials
can lead to higher expenses in the future due to repairs or replacements.
DIY vs. Professional Installation
When to DIY Taking on the installation yourself can save money, especially for smaller projects.
A few considerations to guide your decision:
- Your skill level in home improvement tasks
- The scale of the project
- Availability of time and tools
Benefits of Hiring Professionals While there's an upfront cost, hiring professionals can:
- Ensure quality installation that meets building codes
- Save you time and potential headaches in the long run
- Provide warranties for their work, giving you peace of mind
For more guidance on drywall materials and installation, visit USG Corporation for industry-leading resources.
Efficient Installation Techniques
Preparing the Space Proper preparation is essential for a successful installation. This includes:
- Clearing the room of furniture
- Checking for electrical or plumbing issues
- Ensuring your walls are clean and dry
Tools You’ll Need Using the right tools can also enhance efficiency:
- Drywall knife
- T-square
- Tape measure
- Power drill/screwdriver
Step-by-Step Installation Process
1. Measure and cut the drywall to fit.
2. Secure panels to the wall studs.
3. Tape seams with drywall tape.
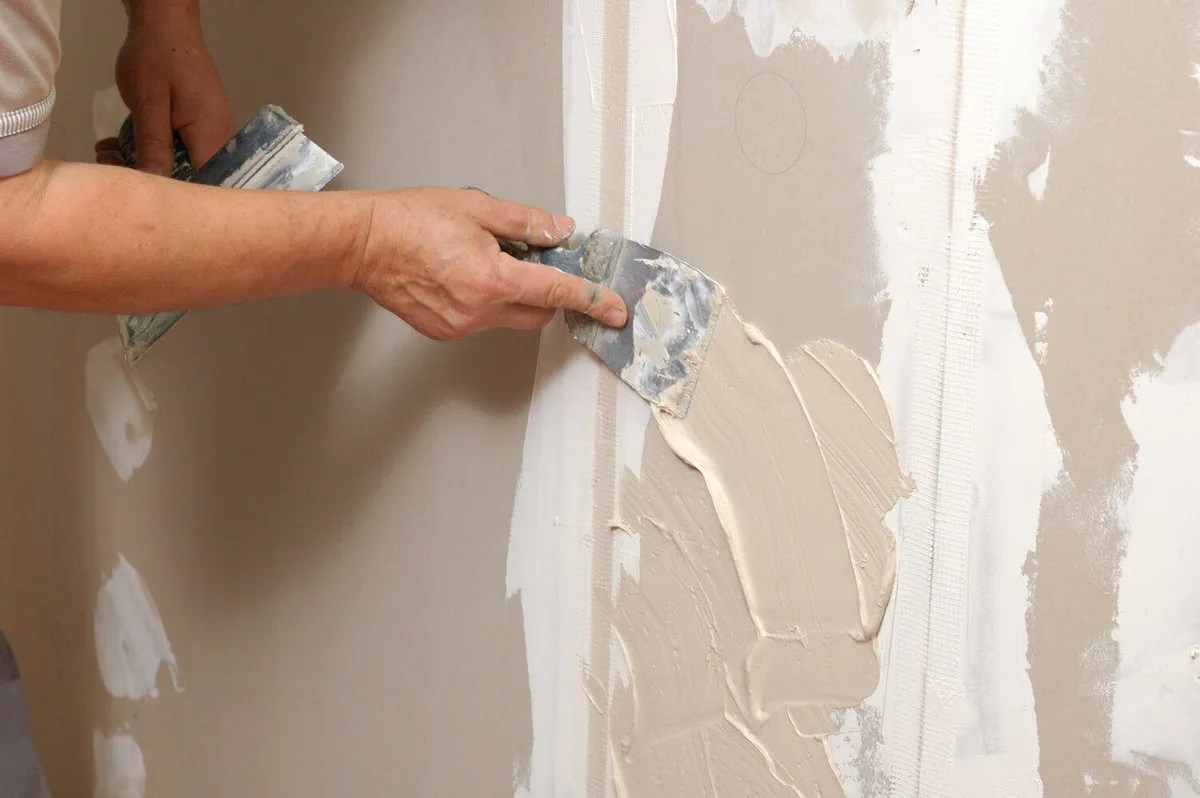
4. Apply joint compound, sand, and finish to create a smooth surface.
By following these guidelines, you can achieve a cost-effective drywall installation that meets
your project's requirements without breaking the bank. Whether you opt for DIY or professional
installation, careful planning and strategic decision-making are key to success.
Ways to Reduce Labor Costs
Planning for Efficiency Planning is crucial for achieving cost-effective drywall installation and can
help lower labor costs significantly. Consider the following strategies:
- Create a detailed project timeline: Outline each phase from prep work to finishing
touches, ensuring that each task is adequately scheduled and assigned.
- Ensure all materials are on-site before work begins: This avoids delays in the
installation process, which can lead to increased labor costs.
- Batch similar tasks: For instance, if painting is part of the project, prepare all drywall
surfaces for paint simultaneously to save on time.
Hiring Strategically If hiring professionals, selecting the right contractor can have a substantial
impact on your overall costs. Tips include:
- Request multiple bids: This allows you to compare costs, services, and expertise.
- Check credentials and references: Ensure the contractor has experience in drywall
installation to minimize mistakes and additional costs.
- Discuss flexible payment options: Some contractors may offer discounts for upfront
payment or project financing.
Negotiating with Contractors Many contractors may be open to negotiation. Here are points to
consider:
- Discuss the scope of work: Be clear about what you want to achieve. If you're willing to
take on some tasks yourself, such as cleanup, you might negotiate a lower rate.
- Timing: Contractors may provide lower rates during off-peak seasons or for projects that
can start on short notice.
- Inquire about package deals: Some contractors might offer bundled services at a
reduced rate, especially if you need both drywall installation and finishing work.
Avoiding Common Mistakes
Overlooking Permit Requirements Before starting your drywall project, ensure you understand
local building codes and permit requirements. Ignoring this can lead to fines or costly delays.
Miscalculating Material Needs One common mistake in cost-effective drywall installation is
miscalculating the amount of drywall and other materials needed. Always:
- Measure walls accurately
- Account for waste and mistakes by adding an additional 10-15% to your material
calculation
Ignoring the Importance of Finishing Quality finishing is key to achieving a professional look.
Neglecting this step can lead to additional costs down the line. Ensure you:
- Use a proper joint compound application technique
- Sand surfaces thoroughly for a smooth final coat
- Invest in high-quality paint and primer for the best results
By considering these strategies for reducing labor costs and avoiding common pitfalls, you can
achieve a successful and cost-effective drywall installation. For further insights on maximizing
project savings and ensuring quality, check out Lowe's for resources and tips.
Maintaining Your Drywall
Regular Inspections Regular inspections are essential for maintaining the integrity of your
drywall and ensuring your cost-effective drywall installation lasts. Schedule periodic checks to
identify potential issues early, such as:
- Cracks or holes: Small blemishes can be repaired easily but can become larger
problems if ignored.
- Moisture damage: Check for signs of water stains or mold, which could indicate a
plumbing issue or inadequate insulation.
- Bowing or sagging: Ensure walls remain straight and even, as this can affect both
aesthetics and structural integrity.
Cost-Effective Repair Solutions When issues do arise, addressing them efficiently can help you
save on future repair costs. Consider these repair techniques:
- Use joint compound: For small cracks, a simple application of joint compound can
restore the surface smoothly.
- Patch with drywall pieces: For larger holes, cut out the damaged area, shape a new
piece of drywall, and secure it in place.
- Invest in tools: Having the right tools, such as a drywall saw, taping knife, and
sandpaper, makes repairs simpler and more efficient.
Preparing for Future Issues To prevent problems from occurring in the first place, proactive
measures can go a long way:
- Seal joints properly: Pay attention to taping and mudding to avoid future cracks.
- Choose quality materials: While it may be tempting to cut corners with cheaper options,
investing in high-quality drywall can pay off in longevity and reduced maintenance costs.
- Control the environment: Keeping humidity levels stable can help prevent
moisture-related issues.
Final Thoughts on Cost-Effective Drywall Installation
Recap of Key Points Implementing effective maintenance practices is vital to maximizing the
longevity of your cost-effective drywall installation. Regular inspections, timely repairs, and
proactive measures will help you avoid escalation of issues and unnecessary costs.
Encouragement to Start Your Project Whether you are fixing a few minor blemishes or planning
a larger drywall project, the principles of cost-effective drywall installation can guide you through
the process smoothly. Remember to plan ahead, choose quality materials, and regularly
maintain your work. For additional resources on drywall solutions, consider visiting Home Depot
for expert guidance and materials.
Final Thoughts on Cost-Effective Drywall
Installation
Recap of Key Points Achieving a cost-effective drywall installation doesn't mean sacrificing
quality or aesthetics. By planning meticulously, selecting appropriate materials, and employing
efficient installation techniques, you can ensure a successful outcome. Remember to keep
these essential points in mind:
- Thoroughly assess project needs before starting.
- Choose materials wisely to stay within budget while ensuring durability.
- Consider DIY options for minor projects to save on labor costs.
- Maintain your drywall regularly to prevent costly repairs down the line.
Encouragement to Start Your Project Now that you understand the principles of cost-effective
drywall installation, it's time to put your knowledge into action. Whether you're renovating a
single room or tackling a larger project, the strategies outlined here will help you achieve
excellent results without overspending.
Don't hesitate to reach out to professionals if you find yourself overwhelmed or
unsure—sometimes, investing in expertise can lead to savings in the long run. For more
resources and tools to aid your project, check out Menards for a wide selection of drywall
materials and home improvement supplies. Start your journey toward a beautifully finished
space today!
Choosing the Right Tools for Installation
Essential Tools for Cost-Effective Drywall Installation Having the right tools can significantly
impact the efficiency and quality of your drywall installation. Here are some essential tools you
should consider for achieving a cost-effective drywall installation:
- Drywall T-Square: This tool helps in accurately measuring and cutting drywall sheets.
- Utility Knife: A sharp utility knife is crucial for making clean cuts and scoring drywall.
- Drywall Lifter: This device assists in holding the drywall in place while you secure it to
the wall or ceiling, making the installation process easier and safer.
- Screw Gun: A screw gun is necessary for fastening drywall to studs. It speeds up the
process and ensures the screws are driven to the right depth.
- Joint Knife: Ideal for applying joint compound smoothly over seams and screw heads.
- Sander or Sanding Block: This helps achieve a smooth finish after applying the joint
compound.
Renting vs. Buying Tools If you're focused on cost-effective drywall installation, consider
whether you should buy or rent your tools:
- Renting: This is a great option for specialized tools or if you're only planning a one-time
use. Rental stores often carry a wide range of drywall tools that you can use for a fraction
of the purchasing price.
- Buying: If you're planning multiple projects or anticipate future work, investing in your
tools might be more economical in the long run.
Pro Tip for Tool Care Taking care of your tools not only prolongs their lifespan, but it also
ensures you get the best results during construction:
- Clean tools after use: Dirt and paint can cause damage or inefficiency.
- Store tools properly: Keep them in a dry place to prevent rusting or wear.
For more ideas on essential tools and equipment needed for drywall projects, visit Harbor
Freight for a comprehensive selection at affordable prices. By preparing adequately with the
right tools, you can enhance your overall experience and achieve a cost-effective drywall
installation with ease.
Tips for Successful Finishing
Understanding the Finishing Process The finishing process is crucial to achieving a polished
look for your drywall project. Proper finishing not only enhances the aesthetics but also ensures
the durability of your cost-effective drywall installation. The main steps include:
- Taping: This involves applying drywall tape over the seams between sheets of drywall to
prevent cracking.
- Mudding: The application of joint compound over the tape to create a smooth surface.
- Sanding: Smoothing out the joint compound once it’s dried to ensure an even finish.
Key Techniques for Finishing To achieve the best results, consider these techniques:
- Use the Right Tools: Employ a quality trowel or joint knife for applying mud to get a
smooth and even layer.
- Multiple Coats: Don't rush. Applying multiple thin coats of joint compound will provide a
better finish than one thick coat.
- Sanding Between Coats: Lightly sand each coat before applying the next to create a
smooth surface. Be sure to wear a mask to avoid inhaling dust.
Common Mistakes to Avoid To ensure a successful finishing process, watch out for these
common pitfalls:
- Skipping the Taping: Not using tape on seams can lead to cracking later on, which
defeats the purpose of your cost-effective drywall installation.
- Applying Mud Too Thickly: Thick applications of mud may appear smooth initially but
can shrink and crack as they dry.
- Neglecting Drying Time: Always allow ample drying time between coats to prevent any
issues with adhesion or texture.
Final Touches Once you’ve finished sanding your last coat, wipe down the drywall with a damp
cloth to remove any dust before priming and painting. This simple step improves the adherence
of paint and provides a better overall finish.
For all your finishing supplies, including joint compound and finishing tools, check out
Sherwin-Williams for high-quality products that complement your cost-effective drywall
installation. By carefully following these tips, you can transform your drywall into a beautifully
finished surface that enhances the overall appeal of your space.
The Importance of Proper Moisture
Control
Why Moisture Matters in Drywall Installation Moisture control is a critical aspect of ensuring
successful and cost-effective drywall installation. Excess moisture can lead to significant
problems, including mold growth, structural damage, and the deterioration of drywall material.
Understanding how to manage moisture effectively will prolong the life of your drywall and
protect your investment.
Identifying Moisture Risks Before beginning your drywall project, it's essential to identify
potential moisture issues within your space. Common moisture risks include:
- Leaky Pipes: Check for plumbing issues that can create damp conditions behind walls.
- Humidity Levels: High humidity can lead to condensation, particularly in bathrooms and
kitchens.
- Inadequate Ventilation: Poor air circulation can result in moisture buildup and mold
problems.
Effective Moisture Control Strategies Implement the following strategies to ensure effective
moisture management during your drywall installation:
- Use Moisture-Resistant Drywall: In areas prone to high humidity, such as bathrooms,
consider using moisture-resistant drywall (also known as green board) for added
protection.
- Seal Gaps and Cracks: Apply caulking to seal gaps around windows, doors, and other
penetrations to prevent moisture ingress.
- Install Vapor Barriers: A vapor barrier can help prevent moisture from seeping through
walls, especially in basements and along exterior walls.
Regular Maintenance and Observation Post-installation maintenance is essential for sustaining
a cost-effective drywall installation:
- Regularly Inspect for Leaks: Check regularly for signs of leaks or water damage.
- Install Dehumidifiers: In humid environments, using a dehumidifier can help maintain
appropriate moisture levels.
- Ensure Proper Ventilation: Utilize exhaust fans in areas like kitchens and bathrooms to
help regulate humidity.
For further resources on building moisture control into your drywall project, visit Goodman
Manufacturing for solutions related to HVAC systems that can aid in regulating indoor air quality.
By taking moisture seriously, you can protect your investment and enjoy a lasting, cost-effective
drywall installation.
Utilizing Technology for Efficient Installation
The Role of Technology in Cost-Effective Drywall Installation Advancements in technology have
significantly impacted the construction industry, providing new tools and techniques that
enhance efficiency and reduce costs. Utilizing technology can lead to a more streamlined and
cost-effective drywall installation process.
Innovative Tools and Software Several tools and software can help optimize your drywall
installation project:
- 3D Modeling Software: Programs like SketchUp allow you to visualize the project space,
enabling better planning for material use and layout.
- Laser Levels: This technology provides precise leveling for drywall installation,
minimizing errors compared to traditional tools.
- Digital Measurement Tools: Electronic measuring devices can quickly and accurately
assess wall dimensions, reducing time spent on manual measurements.
Project Management Applications Integrating project management software can aid in
overseeing your drywall project from start to finish:
- Task Management: Track individual tasks and deadlines to ensure timely progress.
- Budget Tracking: Monitor expenses against the budget to maintain financial control
throughout the project.
- Collaboration Tools: Share plans and updates with team members, ensuring everyone is
on the same page.
Training and Education Investing in training for yourself or your team on the latest technologies
can lead to improved skills and a better understanding of effective installation techniques. Many
resources are available online, including:
- Webinars: Attend webinars related to drywall installation and the use of new
technologies.
- Online Courses: Platforms like Udemy or Coursera offer courses on construction
management and tools that can enhance drywall projects.
For more information on technological advancements in construction, check out The Home
Depot for a variety of tools and resources that can make your cost-effective drywall installation
easier and more efficient. By leveraging technology, you can optimize your workflow, save time,
and ultimately reduce costs in your drywall projects.
Incorporating Sustainable Practices
The Importance of Sustainability in Drywall Installation In today’s environmentally conscious
world, integrating sustainable practices into your cost-effective drywall installation is both
beneficial and necessary. Sustainable methods can help reduce waste, improve energy
efficiency, and promote healthier living spaces.
Choosing Eco-Friendly Materials Selecting sustainable materials is a significant step toward
achieving an eco-friendly drywall project:
- Recycled Drywall: Many manufacturers offer drywall made from recycled materials,
which reduces waste in landfills.
- Low-VOC Products: Selecting paints, primers, and joint compounds that have low
volatile organic compounds (VOCs) can improve indoor air quality while still achieving a
beautiful finish.
Minimizing Waste Reducing waste during installation not only benefits the environment but also
your budget:
- Accurate Measurements: Take precise measurements to limit excess material. This
practice ensures you purchase only what you need.
- Reusing Scraps: Incorporate leftover material in smaller projects or repairs, minimizing
waste and saving costs.
- Disposing of Waste Responsibly: Research local recycling facilities that accept
construction materials to dispose of any unavoidable waste properly.
Energy-Efficient Practices During and after the installation process, consider ways to enhance
energy efficiency:
- Insulating Properly: Adequate insulation behind drywall can significantly reduce energy
bills by maintaining comfortable indoor temperatures.
- Sealing Air Leaks: Use caulk or spray foam to seal gaps around windows, doors, and
outlets, preventing drafts and improving energy efficiency.
For more information on sustainable building materials, visit Green Building Supply which offers
a wide range of eco-friendly products suitable for your cost-effective drywall installation. By
implementing sustainable practices, you not only contribute to environmental preservation but
can also achieve long-term savings and enhance the comfort of your living spaces.
Frequently Asked Questions
What is cost-effective drywall installation?
Cost-effective drywall installation refers to strategies and practices that minimize costs while
maintaining quality in the installation of drywall. This approach focuses on efficient planning,
smart material choices, and effective installation techniques to deliver professional results
without overspending.
How can I determine if I should DIY or hire a professional for my
drywall project?
Deciding between DIY and hiring a professional depends on your skill level, the complexity
of the project, and your budget. If you have experience with home improvement tasks and the
project is small, DIY can save money. However, for larger or more complicated installations,
hiring a professional may be more efficient and ensure better quality.
What type of drywall is best for moisture-prone areas?
For moisture-prone areas such as bathrooms and kitchens, moisture-resistant drywall, often
referred to as green board or cement board, is recommended. These materials are designed
to withstand high humidity and help prevent mold growth, making them ideal for environments
exposed to moisture.
How can I ensure my drywall installation is energy-efficient?
To ensure energy efficiency during drywall installation, use adequate insulation behind your
drywall and seal any gaps or cracks with caulk or foam. This prevents drafts and helps
maintain a consistent indoor temperature, ultimately leading to lower energy bills.
What are some common mistakes to avoid during drywall installation?
Common mistakes to avoid include failing to use drywall tape on seams, applying joint
compound too thickly, and neglecting to ensure adequate drying time between coats. Paying
attention to these details can help prevent future issues, making your cost-effective drywall
installation more successful.
Save Money with Expert Drywall Installation
by The Patch Guyz
When it comes to drywall installation, saving money doesn’t mean sacrificing quality. The
Patch Guyz offers efficient, cost-effective services that focus on precision and durability.
By carefully planning each project and selecting the best materials for your needs, we
ensure you get the most value for your investment. Our team of skilled professionals
handles both small repairs and large installations, providing top-notch craftsmanship that
prevents costly mistakes. Trust The Patch Guyz to deliver excellent results at an affordable
price.
Related Articles
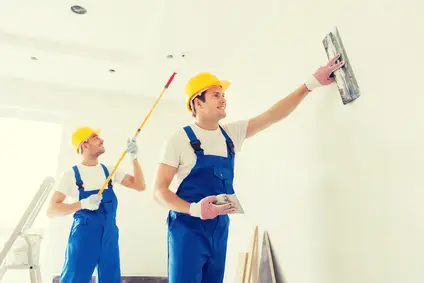
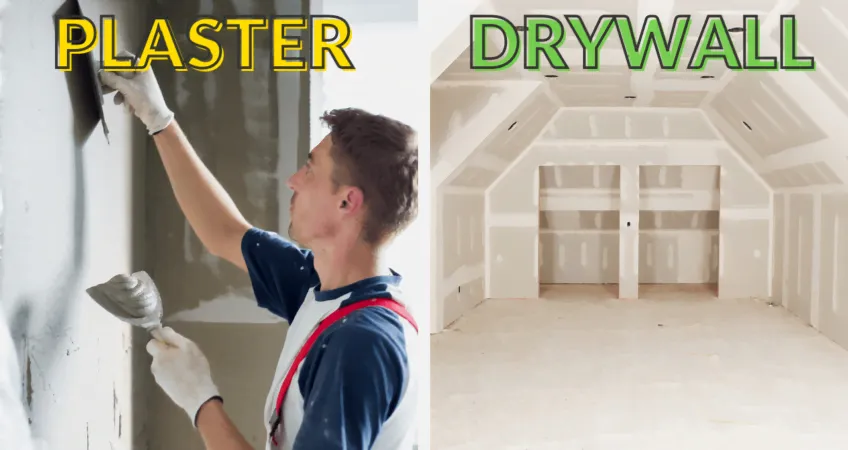
Expert Plaster To Drywall Conversion Services
Are you tired of dealing with the cracks, peeling paint, and ongoing maintenance that often come with plaster walls? If so, it might be time to consid…
Specialized Drywall Tear out and Replacement
When it comes to maintaining a safe and aesthetically pleasing home, specialized drywall tear out and replacement is a crucial service that many homeo…
Durable Plaster To Drywall Conversion Services
Are you tired of the cracks, peeling, and upkeep associated with old plaster walls? Durable plaster to drywall conversion services offer a modern solu…