5 Essential Tips for Effective Residential Drywall Repair
Understanding the Importance of Proper Residential Drywall Repair
Proper maintenance of the drywall in your residential property is crucial to ensuring the structural integrity and aesthetic appeal of your home. Recognizing the signs of damaged drywall is the first step in addressing any issues promptly. Common indicators include cracks, holes, water stains, or visible warping.
Signs of Damaged Drywall in a Residential Setting
- Cracks and fissures along the seams or corners of walls
- Holes from impacts or protruding objects
- Water stains or discoloration indicative of leaks or moisture damage
Consequences of Neglecting Timely Repairs
Neglecting necessary residential drywall repairs can lead to exacerbated damage over time. Untreated cracks and holes may increase in size, compromising the stability of the wall. Water damage left unattended can result in mold growth, further deteriorating the indoor air quality and posing health risks to occupants.
It is essential to address any signs of damage promptly to prevent costly repairs in the future. Regular inspection and maintenance can help maintain the value and comfort of your home.
Assessing the Extent of Damage in Residential Drywall
When facing residential drywall damage, it's essential to accurately assess the severity of the issue before initiating repairs. Understanding the extent of the damage helps determine the appropriate repair techniques and materials needed for a successful restoration.
Techniques for Evaluating the Severity of the Damage
- Visual Inspection: Carefully examine the affected area for visible signs of damage such as cracks, holes, or discoloration.
- Tapping Test: Gently tap on the damaged area to listen for hollow sounds or assess the stability of the drywall.
- Moisture Detection: Use moisture meters to detect hidden water damage that may not be immediately visible.
Identifying Hidden Issues Behind the Visible Damage
Probe for Structural Integrity: Check the surrounding drywall and framing for any weakened or compromised sections.
Inspect Insulation: Verify the condition of insulation behind the damaged drywall, especially in cases of water damage.
Consider Previous Repairs: Evaluate any previous repair work to determine if underlying issues were adequately addressed.
Accurately assessing the extent of damage sets the foundation for effective residential drywall repair and ensures long-lasting results. To learn more about advanced techniques for evaluating drywall damage, consult The Patch Guyz comprehensive guide to Drywall Inspection.
Essential Tools and Materials for Efficient Residential Drywall Repair
Ensuring you have the necessary tools and materials is key to executing a successful residential drywall repair project. Equipping yourself with the right supplies can streamline the repair process and help achieve professional results.
List of Necessary Tools for Different Repair Scenarios
- Drywall Saw: Ideal for cutting precise holes for patching or repair.
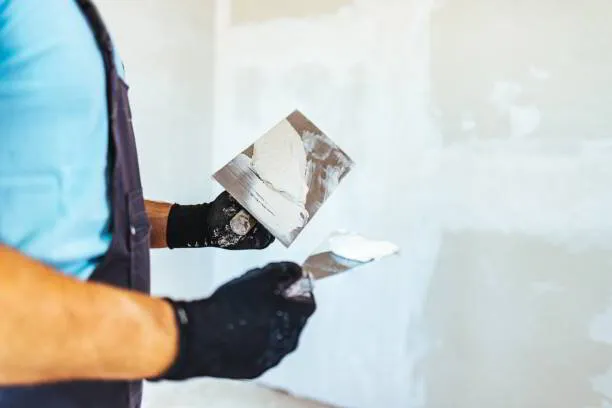
- Putty Knife: Essential for applying joint compound and smoothing out imperfections.
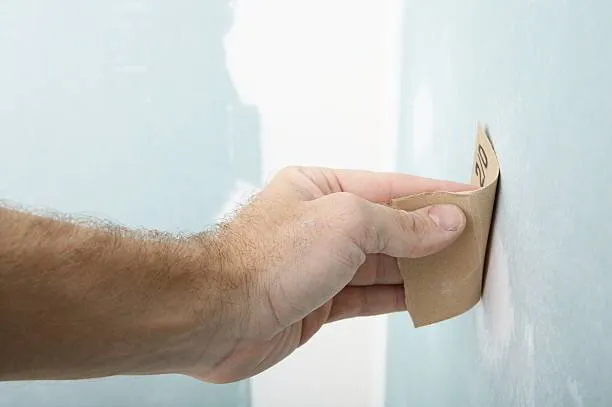
- Sanding Block: Used to sand down dried joint compound for a smooth finish.
- Drywall Tape: Helps reinforce seams and prevent cracking in repaired areas.
- Drywall Screw Gun: Facilitates secure installation of drywall panels.
Recommended Materials for Long-Lasting Repair Results
- Joint Compound: Used for filling gaps, seams, and imperfections in the drywall.
- Drywall Patch Kit: Contains patches and self-adhesive mesh for repairing small holes.
- Primer: Prepares the repaired area for painting and ensures proper adhesion.
- Drywall Screws: Essential for securing drywall panels to the studs.
- Paint and Texture: Match existing wall textures and colors for a seamless finish.
Having the right tools and materials on hand ensures that your residential drywall repair project progresses smoothly and yields durable outcomes.
Step-by-Step Guide to Residential Drywall Repair
Mastering the step-by-step process of residential drywall repair empowers homeowners to address minor damages efficiently and restore the beauty of their living spaces. Following a structured approach ensures a successful repair outcome and a seamless finish.
Preparing the Damaged Area for Repair
1. Clear the Area: Remove any furniture or decorations near the damaged section to create a safe workspace.
2. Clean the Surface: Wipe down the damaged area to remove dust, debris, and grease that may affect the adhesion of repair materials.
3. Cut Out Damaged Portions: Use a drywall saw to cut out damaged sections in a square or rectangular shape for easier patching.
Repair Techniques for Common Types of Damage
1. Filling Holes: Apply joint compound using a putty knife to fill small to medium-sized holes, smoothing the surface with a drywall knife.
2. Fixing Cracks: Use mesh drywall tape to cover cracks, apply joint compound, and feather the edges for a seamless repair.
3. Replacing Larger Areas: Cut a new drywall piece to fit the damaged area, secure it with screws, tape the seams, and apply joint compound for blending.
By following these step-by-step instructions and techniques, homeowners can achieve professional-quality results in their residential drywall repair endeavors. For more in-depth guidance on specific repair methods, reach out to The Patch Guyz for a free estimate.
Tips for a Professional Finish in Residential Drywall Repair
Achieving a professional finish in residential drywall repair not only enhances the appearance of your home but also ensures the longevity of the repairs. Paying attention to details such as sanding, painting, and final touches can elevate the overall outcome of the repair project.
Sanding and Smoothing Techniques for Seamless Results
- Use Fine Grit Sandpaper: Start with coarse sandpaper to smooth down rough areas, then switch to fine grit sandpaper for a polished finish.
- Feather Edges: Blend the edges of the repair area with the surrounding drywall by feathering the joint compound thinly and evenly.
- Avoid Over-Sanding: Be cautious not to over-sand as it can create uneven surfaces or damage the repaired area.
Painting and Finishing Touches for a Polished Outcome
- Prime Before Painting: Apply a primer to the repaired area to ensure the paint adheres properly and provides a uniform finish.
- Match Paint Colors: Select paint that matches the existing wall color and texture for a seamless blend.
- Textures and Patterns: Replicate any wall textures or patterns to maintain consistency throughout the repaired area.
By implementing these tips and techniques, homeowners can elevate their residential drywall repairs from functional fixes to professional-quality results. For expert advice on achieving the perfect paint finish, you can contact The Patch Guyz for expert advice.
Frequently Asked Questions about Residential Drywall Repair
How long does it typically take to complete a residential drywall repair?
The time required for a residential drywall repair varies depending on the extent of the damage. Minor repairs such as small holes may be completed within a few hours, while larger repairs or extensive damage may take a couple of days to finish.
Can I paint over the repaired drywall immediately?
It's recommended to allow the repaired drywall to dry completely before painting. Depending on the type of joint compound used and the humidity levels, drying times can range from 24 to 48 hours. Ensure the surface is fully dry and smooth before applying paint for the best results.
Do I need to hire a professional for all types of residential drywall repair?
While some minor repairs can be performed by homeowners with basic DIY skills, more significant damage or complex repairs may require the expertise of a professional drywall repair service. Consulting with professionals can ensure proper assessment and execution of the repair.
How can I prevent future drywall damage in my home?
To prevent future drywall damage, consider addressing any moisture issues promptly, such as fixing leaks or controlling humidity levels. Avoid hanging heavy objects directly on drywall and be cautious during renovations to prevent accidental damage.
Is it necessary to sand the repaired drywall before painting?
Sanding the repaired drywall is crucial for achieving a smooth and seamless finish. It helps blend the repaired area with the surrounding wall, ensuring a professional-looking result. Proper sanding techniques can enhance the overall aesthetics of the repair job.
Related Articles
Expert quick turnaround for drywall repair projects in Detroit
Are you facing a sudden drywall issue that requires immediate attention? When it comes to quick turnaround drywall repair projects, time is of the ess…
Comparing drywall repair costs in detroit a comprehensive guide
Picture this: you're faced with a damaged wall in your Detroit home, and now comes the task of comparing drywall repair costs in Detroit. How do you n…
5 Cost Effective Solutions for Drywall Repairs
How to Identify Cost-Effective Solutions for Drywall Repairs Understanding the Scope of the Repair When facing drywall issues, it's crucial to first a…