Flawless Fixes: The Ultimate Guide to Repairing Walls After Plumbing Work
Ultimate Guide: How to Repair Walls After Plumbing Work
Introduction
When plumbing emergencies strike or renovations require pipe access, the aftermath often leaves homeowners facing damaged walls and ceilings that need immediate attention. Understanding how to repair walls after plumbing work is essential for maintaining your property's structural integrity and aesthetic appeal. Whether you're dealing with emergency pipe repairs, planned bathroom renovations, or routine plumbing maintenance, wall damage is an inevitable consequence that requires prompt and professional handling.
The scope of repairs needed after plumbing work varies significantly depending on the project's complexity and the access methods used. Emergency situations, such as burst pipes behind walls, often result in extensive water damage that affects not only the drywall but also insulation, electrical components, and structural elements. Planned renovations typically involve more controlled demolition, but still require careful restoration to ensure seamless integration with existing finishes.
Professional wall restoration involves multiple stages, from initial damage assessment to final painting and finishing touches. Each step requires specific skills, tools, and materials to achieve results that blend seamlessly with your existing walls. While some homeowners attempt DIY repairs, understanding the complexity of proper drywall repair and ceiling restoration helps determine when professional intervention becomes necessary for optimal results and long-term durability.
Common Types of Damage from Plumbing Work
Plumbing projects create various types of wall damage that require different repair approaches and techniques. Understanding these damage patterns helps property owners prepare for the restoration process and budget accordingly for necessary repairs.
Water damage represents the most common and potentially destructive consequence of plumbing work. When pipes leak or burst behind walls, moisture saturates drywall, causing it to weaken, sag, and potentially develop mold growth. This type of damage often extends beyond the immediate repair area, affecting adjacent walls and ceiling sections. Water-damaged drywall loses its structural integrity and cannot be simply patched – it typically requires complete removal and replacement to prevent future problems.
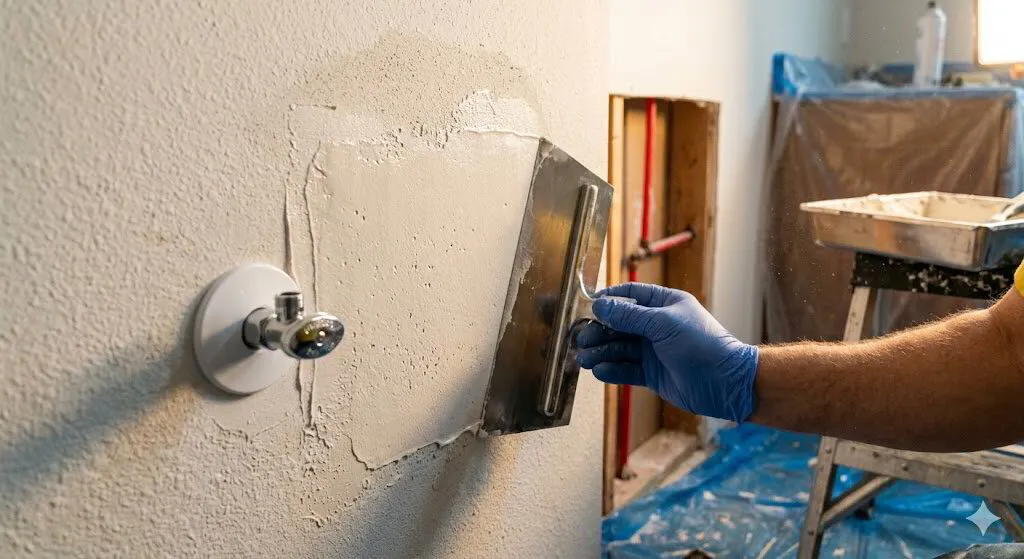
Structural damage from pipe access represents another significant category of plumbing-related wall damage. Plumbers often need to cut large openings in walls to reach pipes, install new fixtures, or replace damaged sections. These access holes can range from small circular cuts for individual pipe repairs to large rectangular sections for major installations. The size and location of these openings determine the complexity of the repair process and whether simple patching or full drywall replacement becomes necessary.
Ceiling damage frequently accompanies plumbing work, especially when addressing second-floor bathroom issues or main line problems. Ceiling restoration often proves more challenging than wall repairs due to gravity working against the repair materials and the difficulty of achieving smooth, even finishes on overhead surfaces. Additionally, ceiling damage may involve textured surfaces that require specialized techniques to match existing patterns and maintain consistent appearance throughout the room.
Tools and Materials Needed
Successful wall repair after plumbing work requires specific tools and materials designed for professional-quality drywall repair and finishing. Having the right equipment ensures efficient work progress and superior results that match existing wall surfaces.
Essential cutting and measuring tools include a sharp utility knife with replaceable blades, a drywall saw for larger cuts, a measuring tape, and a pencil for marking. A T-square or drywall square ensures straight, accurate cuts that fit properly into damaged areas. For more complex repairs, a reciprocating saw with fine-tooth blades may be necessary to remove damaged sections cleanly.
Application tools focus on spreading and smoothing compounds for seamless repairs. A set of drywall knives in various widths (4-inch, 6-inch, 10-inch, and 12-inch) allows for different stages of compound application. A mud pan holds joint compound during application, while a sanding block or electric sander prepares surfaces for painting. A utility knife helps trim drywall tape to appropriate lengths.
Material requirements include drywall sheets in appropriate thickness (typically ½-inch for most residential applications), joint tape (paper or fiberglass mesh), and joint compound in different grades. All-purpose compound works for most applications, while lightweight compound offers easier sanding. Primer specifically designed for drywall ensures proper paint adhesion, and matching paint completes the repair process.
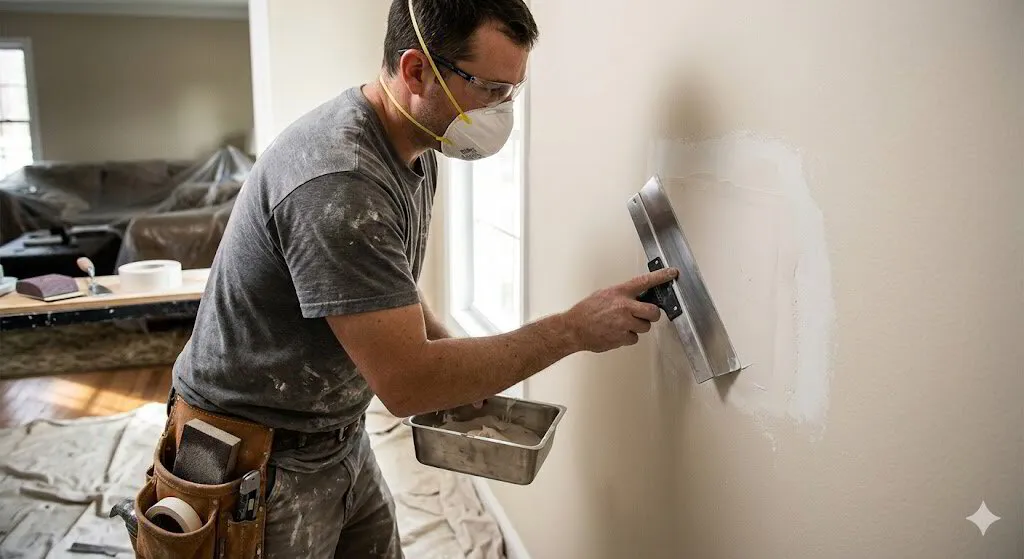
Safety equipment protects workers during repair operations. Dust masks prevent inhalation of drywall particles during sanding, safety glasses protect eyes from debris, and work gloves provide hand protection. Drop cloths protect flooring and furniture from compound spills and paint splatters. Adequate lighting, either natural or supplemental work lights, ensures accurate color matching and quality control throughout the repair process.
Step-by-Step Guide to Repairing Walls After Plumbing
Learning how to repair walls after plumbing work requires following a systematic approach that ensures professional results and long-lasting repairs. This comprehensive process addresses everything from initial damage assessment to final finishing touches.
Damage Assessment and Preparation
Begin by thoroughly examining the affected area to determine the extent of damage and necessary repairs. Check for water damage, structural issues, and the condition of surrounding drywall. Use a moisture meter to detect hidden water damage that may not be visible on the surface. Mark areas requiring repair with a pencil, extending boundaries slightly beyond visible damage to ensure complete removal of compromised material.
Remove all damaged drywall using a utility knife to score the surface, then break away sections carefully. For water-damaged areas, cut back to dry, solid material to prevent future mold growth. Clean the exposed area thoroughly, removing any debris, old joint compound, or loose material that could interfere with new repairs.
Measuring and Cutting Replacement Pieces
Accurate measurements ensure proper fit and minimize the need for additional adjustments. Measure the opening carefully, accounting for any irregular shapes or angles. Transfer these measurements to new drywall, marking cut lines clearly with a pencil and straightedge.
Cut drywall pieces using a sharp utility knife, scoring the paper face completely, then snapping the piece along the score line. Cut through the paper backing with the knife to separate the piece completely. Test-fit each piece before proceeding, making minor adjustments as needed for proper fit.
Installing Drywall Patches
For small holes, use a drywall patch kit or create backing support with mesh tape or small wood strips. Position the patch carefully, ensuring it sits flush with the surrounding surface. For larger repairs, secure new drywall pieces to existing studs using drywall screws placed every 8-12 inches along the edges.
Drive screws slightly below the surface without breaking the paper face, creating small dimples that will be filled with joint compound. Ensure all edges are properly supported and secured before proceeding to the taping stage.
Applying Joint Tape and Compound
Apply a thin layer of joint compound over all seams and screw holes using a 4-inch drywall knife. Embed joint tape into the wet compound, pressing firmly to remove air bubbles and ensure good adhesion. Apply additional compound over the tape, feathering edges to create smooth transitions.
Allow the first coat to dry completely (typically 24 hours) before applying subsequent coats. Apply second and third coats with progressively wider knives (6-inch, then 10-inch), extending each coat beyond the previous layer to create gradual transitions that blend seamlessly with existing surfaces.
Sanding and Surface Preparation
Once all compound coats are completely dry, sand the repaired areas using fine-grit sandpaper (120-150 grit) or a sanding sponge. Work carefully to avoid over-sanding, which can damage the surrounding wall surface or create depressions in the repair area.
Focus on smoothing ridges and imperfections while maintaining the overall flatness of the wall surface. Use a work light positioned at an angle to highlight any remaining imperfections that need attention. Clean all dust from the surface using a tack cloth or vacuum before proceeding to priming.
Priming and Painting
Apply high-quality primer specifically designed for drywall to all repaired areas. Primer seals the joint compound and ensures uniform paint absorption, preventing the repaired areas from showing through the final paint coat. Allow primer to dry completely according to manufacturer specifications.
Apply paint in thin, even coats using the same technique used for the original wall finish. For best results, paint the entire wall from corner to corner rather than just the repaired area, ensuring uniform color and sheen throughout the surface. This approach eliminates visible repair boundaries and creates professional-looking results that blend seamlessly with existing finishes.
Common Mistakes to Avoid
Understanding frequent errors in wall repair after plumbing work helps ensure successful outcomes and prevents costly rework. These mistakes often stem from rushing the process or underestimating the complexity of proper drywall repair techniques.
Inadequate moisture control represents the most critical error in post-plumbing wall repairs. Failing to address underlying moisture issues or beginning repairs before affected areas are completely dry leads to mold growth, compound adhesion problems, and premature repair failure. Always verify that moisture levels have returned to normal before starting repairs, and address any ongoing leaks or humidity issues that contributed to the original damage.
Improper joint compound application creates visible seams and uneven surfaces that become apparent after painting. Common application errors include applying compound too thickly, failing to feather edges properly, or skipping intermediate coats. Each compound application should be thinner and wider than the previous coat, creating gradual transitions that disappear when painted. Rushing this process or attempting to build up thickness too quickly results in cracking, shrinkage, and visible repair lines.
Inadequate surface preparation, particularly insufficient sanding and priming, leads to poor paint adhesion and visible texture differences. Skipping the sanding step leaves ridges and imperfections that become magnified under paint, while inadequate priming causes joint compound to absorb paint differently than surrounding drywall. These shortcuts may save time initially but create noticeable quality issues that require complete rework to correct properly.
When to Hire a Professional
Recognizing when wall damage exceeds DIY capabilities helps property owners make informed decisions about professional intervention. Several factors indicate that professional drywall repair services provide better outcomes than attempting self-repairs.
Extensive water damage often requires professional assessment and remediation beyond simple wall patching. When moisture has penetrated insulation, affected electrical systems, or created potential mold conditions, professional restoration services ensure comprehensive problem resolution. Professionals have specialized equipment for moisture detection, mold prevention, and proper disposal of contaminated materials that homeowners typically cannot access.
Structural complications, such as damage to load-bearing elements or extensive ceiling restoration, require professional expertise to maintain building integrity. Large repair areas, particularly those involving multiple walls or complex architectural features, benefit from professional techniques and equipment that ensure seamless integration with existing finishes.
Time constraints and quality expectations often favor professional services for property managers and landlords who need reliable, fast turnaround for rental properties. Professional teams complete repairs more quickly than DIY approaches while guaranteeing results that meet tenant expectations and maintain property values.
Professional services also provide valuable warranties and insurance coverage that protect property owners from future issues. When repairs are part of insurance claims or require documentation for property sales, professional work provides necessary documentation and quality assurance that DIY repairs cannot match. The investment in professional wall damage repair often proves cost-effective when considering time savings, material efficiency, and guaranteed results.
Conclusion and Recap
Mastering how to repair walls after plumbing work requires understanding the complexity of proper restoration techniques and recognizing when professional intervention ensures optimal results. The process involves systematic damage assessment, careful material selection, precise application techniques, and attention to detail throughout every stage from initial preparation to final finishing.
Successful repairs depend on addressing underlying moisture issues, using appropriate tools and materials, and following proven techniques for compound application and surface preparation. Common mistakes, such as inadequate drying time, improper joint compound application, and insufficient surface preparation, can be avoided through careful planning and patience throughout the repair process.
While DIY approaches may work for minor damage, extensive water damage, structural complications, or time-sensitive situations often require professional expertise to achieve seamless results that maintain property value and aesthetic appeal. Professional services provide specialized equipment, proven techniques, and quality guarantees that ensure long-lasting repairs.
The investment in proper wall repair, whether DIY or professional, protects your property's structural integrity and maintains its visual appeal. Taking time to understand the repair process helps property owners make informed decisions about tackling repairs themselves or engaging professional services for optimal outcomes.
Call-To-Action
Don't let wall damage from plumbing work compromise your property's appearance and value. The Patch Guyz specializes in professional drywall repair and ceiling restoration throughout Southeastern Michigan, providing fast, reliable solutions that blend seamlessly with existing finishes. Our experienced team handles everything from minor patches to extensive water damage restoration, ensuring your walls look perfect when the job is complete. Contact The Patch Guyz today for a free estimate on your wall repair project and discover why property owners throughout the Detroit metro area trust us for superior craftsmanship and transparent service.
Web Standards & Documentation Reference
To ensure our localized drywall and plumbing-damage repair services are accurately indexed and structured for search engines, this site adheres to official XML schema guidelines.
- Sitemap XML Protocol 0.9 The authoritative schema standard (`http://www.sitemaps.org/schemas/sitemap/0.9`) for structuring URLs.
- Implementation FAQ Technical constraints, file size limits, and index file formatting.
Related Articles
Seamless Drywall Patch Services: Your Ultimate Comparison Guide
When drywall damage strikes your property, the quality of repair work can make the difference between a professional-looking finish and an obvious pat…