DIY Guide to Fixing Drywall Cracks
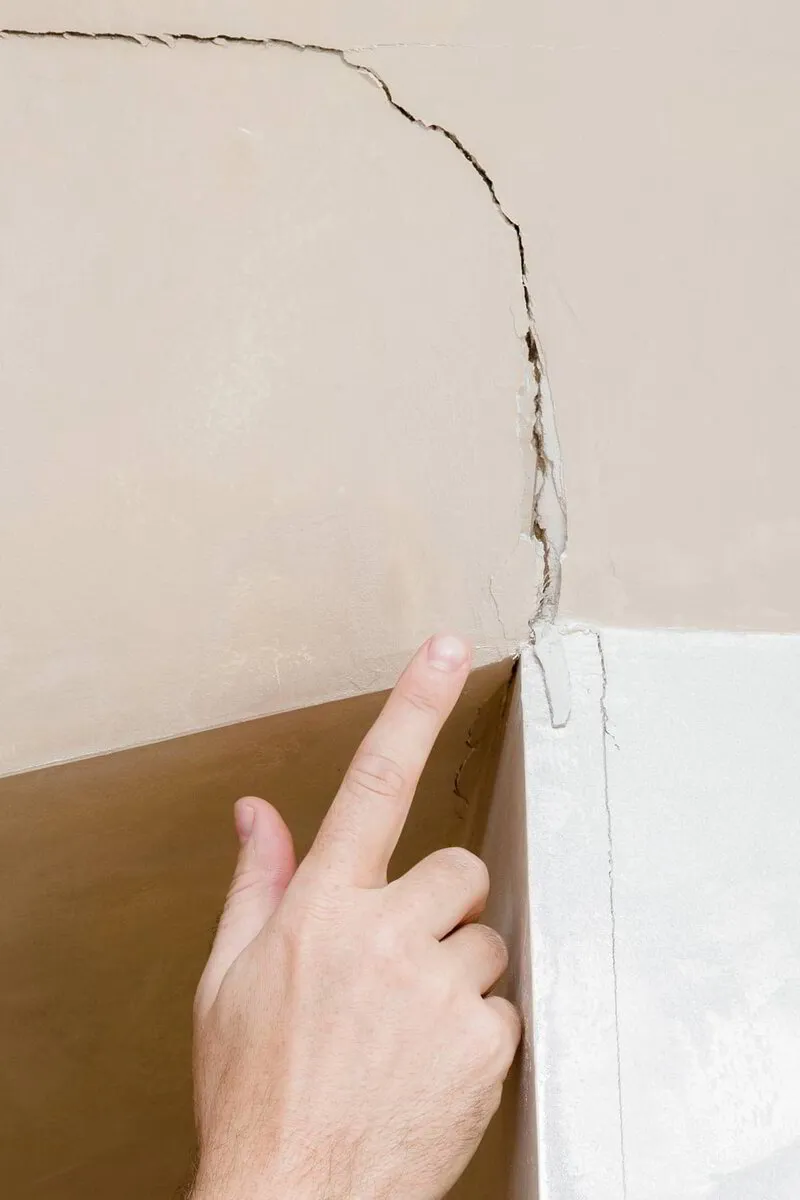
Have you ever noticed unsightly cracks in your walls and wondered how to fix them? A thorough
DIY guide to fixing drywall cracks can be a game-changer for homeowners looking to maintain
the beauty of their living spaces. Drywall cracks are not only an eyesore; they can also be
indicative of underlying issues within your home. Fortunately, with the right tools and techniques,
addressing these cracks can be a manageable DIY project. Whether you’re dealing with hairline
cracks or larger, more concerning gaps, knowing how to tackle them can save you time and
money while enhancing the overall aesthetic of your home. In this guide, we’ll walk you through
everything you need to know to become a drywall repair pro.
Understanding Drywall Cracks
Drywall cracks are common occurrences in many homes, and understanding their nature is
the first step in effectively addressing them. By identifying the type of crack and its underlying
causes, homeowners can make informed decisions about their repair options.
Types of Drywall Cracks
There are several types of cracks that may appear in your drywall:
- Hairline Cracks: These are small, thin cracks often caused by settling in the home
structure.
- Vertical Cracks: Typically found in walls, vertical cracks can indicate shifts within
the framing.
- Horizontal Cracks: Often more serious, horizontal cracks may signal structural issues.
- Stressed Cracks: These appear around windows and doors and are usually a result of
improper installation.
Common Causes of Drywall Cracks
Before diving into repairs, it’s important to understand what causes these cracks:
- House Settling: Over time, as the foundation settles, stress can create cracks in the
drywall.
- Humidity and Temperature Fluctuations: Changes in moisture levels can cause
expansion or contraction in drywall materials.
- Improper Installation: Poor workmanship, such as the use of inadequate fasteners,
can lead to stress on the drywall.
- Water Damage: Leaks or moisture exposure can weaken drywall integrity, causing
it to crack.
Knowing When to DIY vs. When to Call a Professional
While many drywall cracks can be fixed with some DIY skills, it’s essential to know when to
seek help. A minor crack might be easily addressed by following a DIY guide to fixing drywall
cracks, but significant damage, particularly those indicating structural issues, may warrant
professional assistance. If you're unsure, a home inspection can provide valuable insights.
Tools and Materials You’ll Need
Before starting any drywall repair project, gather the necessary tools and materials to ensure
a smooth process:
Essential Tools for Drywall Repair
- Taping knife or putty knife
- Sandpaper or sanding block
- Utility knife
- Paintbrush or roller
Recommended Materials for Patchwork
- Joint compound
- Drywall tape (mesh or paper)
- Primer and paint
Safety Gear
Always prioritize safety when doing repairs. Consider using:
- Safety goggles
- Dust mask
- Gloves
Preparing the Area for Repair
Once you've identified the problem and gathered your materials, it’s time to prepare the area.
Proper preparation is crucial to achieving a successful repair.
Clearing the Space
Start by moving furniture, decor, and other items away from the repair area to ensure a safe
working environment.
Protecting Surrounding Areas
To prevent unintentional damage to nearby surfaces, use drop cloths or plastic sheeting.
Painter’s tape can help in protecting edges where walls meet ceilings or trim.
Assessing the Damage
Take a closer look at the crack to determine its severity. A well-prepared assessment helps in
deciding the correct repair methods required.
For more detailed resources on home repair, visit The Home Depot for guidance and supplies.
Step-by-Step Guide to Fixing Drywall
Cracks
Now that you're prepared, let’s dive into the DIY guide to fixing drywall cracks using a
straightforward, step-by-step approach. Depending on the size and type of crack, the methods
may vary.
Small Hairline Cracks
1. Clean the Area: Gently scrape any loose debris around the crack using a utility knife to
create a clean surface for the patch.
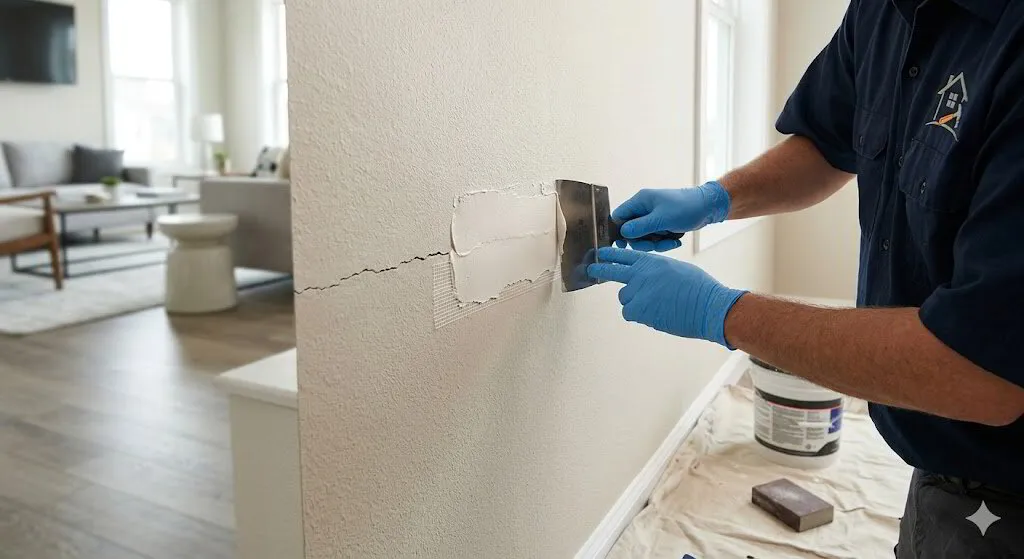
2. Apply Joint Compound: Using a taping knife, spread a thin layer of joint compound over
the crack, feathering the edges to blend with the wall.
3. Sand the Surface: Once the compound has dried, sand the area smoothly until it is flush
with the surrounding wall.
4. Prime and Paint: Apply primer followed by paint to match the existing wall color.
Medium Cracks
1. Widen the Crack: Using a utility knife, widen the crack slightly to give the patch more
surface to adhere to.
2. Insert Drywall Tape: Place drywall tape over the crack, ensuring it is centered. This tape
reinforces the joint and reduces the chance of future cracking.
3. Apply Joint Compound: Spread a thick layer of joint compound over the tape, smoothing it
out. Allow it to dry and then apply additional layers as needed.
4. Sand, Prime, and Paint: Sand the dried compound, prime the area, and finish with paint
for a polished look.
Large Cracks and Holes
1. Cut Out the Damaged Area: For large cracks or holes, use a utility knife to cut a
rectangular section around the damage to create a clean opening.
2. Install a Backer Board: Attach a backer board (like a piece of plywood) inside the wall
to provide support when you add the patch.
3. Attach a Drywall Patch: Cut a piece of drywall to fit the opening, screw it into the backer
board, and ensure it’s snug against the frame.
4. Tape and Compound: Tape the seams with drywall tape and apply joint compound over
the patch. Feather the edges to ensure a seamless appearance.
5. Final Sanding and Finishing: Sand the area after it dries, apply primer, and paint to
match the existing wall seamlessly.
By following these steps from the DIY guide to fixing drywall cracks, you can achieve a
professional-looking repair on your own. If you find that your cracks are recurrent or worsening,
consider consulting a professional for a thorough inspection.
For supplies and more information, check out Lowe's to find everything you need for your
drywall repair projects.
Finishing Touches
Once you’ve successfully patched the drywall cracks, it’s time to focus on the finishing touches
to ensure a seamless appearance that blends well with the surrounding wall.
Sanding and Smoothing the Repair
- Dry Completely: Before sanding, make sure that the joint compound has completely
dried according to the manufacturer's instructions.
- Use the Right Grit: Start with a medium-grit sandpaper (around 120 grit) to smooth out
any rough edges, and finish with a fine-grit sandpaper (220 grit) for a polished look.
- Feather the Edges: Sand the area in a circular motion, feathering the edges to blend
the repair with the existing wall. This ensures that no noticeable bumps or lines will be
visible after painting.
Priming the Repaired Area
- Importance of Priming: Priming is essential as it helps seal the joint compound,
prevents flashing (uneven paint sheen), and ensures better paint adhesion.
- Choose the Right Primer: Opt for a high-quality latex primer, which dries fast and is
easy to work with. If repairing a moisture-damaged area, consider using a
mold-resistant primer.
- Application Method: Use a brush for edges and a roller for larger areas to apply a
uniform coat of primer. Allow it to dry completely before moving to painting.
Painting Tips for a Seamless Finish
- Match the Color: For the best results, use the same paint color and finish that is already
on your wall. If you can’t find the exact match, take a sample to your local paint store for
color matching.
- Test First: It’s always a good idea to test a small amount of paint on the repaired area to
ensure it matches well. Adjust if necessary.
- Use Multiple Coats: Depending on the color and finish, you might need more than one
coat of paint for full coverage. Allow each coat to dry before applying the next.
By following these finishing touches outlined in this DIY guide to fixing drywall cracks, you can
ensure that your repairs look professional and blend seamlessly with the rest of your walls. This
attention to detail will not only enhance the aesthetics of your space but also protect your home
from future damage.
For more home improvement resources and supplies, visit Home Depot to find everything you
need for your drywall projects.
Preventing Future Cracks
Once you've repaired the drywall cracks in your home, it's essential to take steps to prevent
them from reappearing. A proactive approach can save you time and effort in the long run. Here
are some strategies to consider:
Regular Home Maintenance
- Routine Inspections: Regularly check for signs of cracks or damage, especially after
significant weather changes. Early detection can lead to easier repairs.
- Check Your Foundation: Look for any uneven settling in your home’s foundation, which
can contribute to structural issues over time. Addressing foundation problems promptly
can prevent drywall cracks.
- Inspect Windows and Doors: Ensure that windows and doors open and close smoothly.
If they are sticking or have become misaligned, it might indicate that your house is
shifting, which could lead to cracks.
Addressing Moisture Issues
- Control Humidity Levels: High humidity can worsen drywall cracks. Use dehumidifiers in
damp areas of your home, like basements, to maintain appropriate moisture levels.
- Fix Leaks Immediately: If you notice leaks from plumbing, roofs, or windows, repair them
as soon as possible to prevent water damage that can weaken drywall.
- Ventilation: Ensure proper ventilation in areas prone to moisture such as bathrooms and
kitchens. Installing exhaust fans can help circulate air and reduce humidity.
Monitoring Structural Changes
- Be Aware of Landscape Changes: Changes in landscaping, like tree growth or heavy
rainfall, can affect the stability of your home’s foundation. Keep an eye on any new
plantings that may impact the soil around your house.
- Plan for Renovations: If planning to renovate or remodel, consult with a contractor to
assess how the work may affect the existing structure and drywall.
By implementing these strategies from the DIY guide to fixing drywall cracks, you can reduce
the likelihood of future issues. A well-maintained home is not only more beautiful but also more
reliable in the long run.
For additional home maintenance supplies and tips, visit Lowe's, where you can find a variety
of tools and materials to help protect your home.
Conclusion: Mastering Your DIY Skills
Completing repairs can be a fulfilling process, and using this DIY guide to fixing drywall cracks
equips you with the skills required to maintain your home effectively. Having a solid
understanding of drywall repair not only enhances your living space but also boosts your
confidence in handling home improvement projects.
When to Seek Professional Help
While many cracks can be managed with DIY techniques, it's crucial to know your limits. Consider
consulting a professional in the following situations:
- Widespread Cracking: If you notice multiple cracks appearing throughout your home, it
might indicate underlying structural issues.
- Water Damage: Severe water damage requires expert assessment and may necessitate
specialized repairs beyond simple patchwork.
- Limited Experience: If you're uncertain about the repair process or lack the necessary
tools, hiring a professional can save you time and provide peace of mind.
Additional Resources for Drywall Repairs
To continue enhancing your home repair knowledge, look for additional resources such as
tutorials and instructional videos. Many reputable companies provide valuable insights.
A great place to start is The Home Depot, where you can find online guides as well as material
supplies for your next drywall project. Moreover, local workshops often offer hands-on training
for DIY enthusiasts at all skill levels.
By mastering the techniques outlined in this guide, you're well on your way to becoming a
knowledgeable homeowner and tackling drywall issues like a pro in your future projects!
FAQs About Drywall Cracks and Repairs
As you embark on your journey of drywall repair, you may have some questions. Here are
some frequently asked questions that can further enhance your understanding of the DIY guide
to fixing drywall cracks.
What causes drywall cracks?
Drywall cracks can be attributed to various factors, including:
- Natural settling of the home: As homes age, they may naturally settle, leading to small
cracks.
- Humidity and temperature changes: Fluctuations can result in expansion and
contraction, causing cracks.
- Poor installation: If drywall wasn't hung correctly, it may develop cracks over time.
- Water damage: Leaks or moisture can weaken drywall materials, contributing to crack
formation.
Is it difficult to fix drywall cracks?
Fixing drywall cracks can vary in difficulty based on the size and type of damage. Small hairline
cracks are relatively easy to repair and can be done by most homeowners. Medium to large
cracks may require more attention but can still be managed with the right techniques as outlined
in this DIY guide.
How do I know if a crack is serious or just cosmetic?
Consider the following indicators:
- Cracks wider than 1/8 inch: These may signal structural issues and warrant professional
inspection.
- Cracks that continue to grow or change shape: This can indicate shifting within the
home’s foundation.
- Presence of bulging or sagging drywall: These symptoms should be evaluated by a
professional for underlying problems.
Can I paint over repaired drywall cracks?
Yes, once you have primed the repaired area, you can paint over it to match the rest of your wall.
Make sure the repair is completely sanded and smooth for the best finish.
For more resources on drywall repair and home projects, be sure to check out Menards for a
wealth of information and materials.
Additional Resources for Drywall Repairs
If you're looking to deepen your understanding and skills related to drywall repairs beyond the
DIY guide to fixing drywall cracks, several resources can enhance your knowledge and
confidence. Here's a list of helpful options:
Online Video Tutorials
- YouTube: Various channels offer step-by-step visuals on drywall repairs, making it easier
to grasp techniques. Look for channels dedicated to home improvement or DIY projects.
- Professional Websites: Many contractors and drywall experts post video tutorials on their
websites, showcasing best practices for repairs.
Books and eBooks
- Home Improvement Guides: Search for reputable titles at your local library or bookstore
that specialize in drywall repair. Look for books that include diagrams and detailed
instructions.
- eBooks: Consider purchasing eBooks that focus on DIY home repairs. These often
provide a comprehensive look at various projects, including drywall.
Community Workshops
- Local Home Improvement Stores: Many stores, like Home Depot, host workshops that
cover drywall repair. These sessions provide hands-on experience and direct access to
knowledgeable staff.
- Community Centers: Check with your local community center for workshops or classes
focusing on home repair skills.
Forums and Online Communities
- DIY Forums: Participating in online forums can provide you with answers to specific
questions and connect you with experienced DIY enthusiasts.
- Social Media Groups: Look for groups on platforms like Facebook where members
share their experiences and techniques related to drywall repairs and home improvement.
By utilizing these additional resources, you can further refine your skills and expand your ability
to handle drywall repairs, ensuring you feel fully equipped to tackle any project that arises.
Remember, practice makes perfect, and with each repair, you’ll become more proficient in
maintaining your home!
What types of drywall cracks are there?
There are several types of drywall cracks that homeowners commonly encounter. Hairline
cracks are small and often superficial, indicating minor settlement. Vertical cracks can signal
structural shifts, while horizontal cracks may suggest more serious foundation problems.
Stressed cracks usually form around windows and doors due to expansion and contraction.
Identifying the type of crack helps determine the appropriate repair method.
How can I tell if a crack is serious?
To assess whether a crack is serious, look for its width and growth pattern. Cracks wider than
1/8 inch may indicate significant structural issues, especially if they continue to expand over
time or change shape. Additionally, watch for signs of bulging or sagging in the drywall, which
may necessitate professional inspection.
Can I repair drywall cracks myself?
Yes, many homeowners can successfully repair drywall cracks themselves. With the right tools,
materials, and techniques outlined in a comprehensive DIY guide to fixing drywall cracks, you
can handle small to medium repairs. For large cracks or extensive damage, however,
consultation with a professional may be a better option.
How long does it take for joint compound to dry?
The drying time for joint compound typically depends on factors such as temperature and
humidity. Generally, it takes about 24 hours for a single layer of joint compound to dry thoroughly,
but it can vary. Always check the manufacturer's instructions for specific drying times, and ensure
the compound is well dried before sanding or applying additional layers.
Is it necessary to prime repaired areas before painting?
Yes, priming is an essential step before painting over repaired areas of drywall. Priming helps
seal the joint compound, ensuring better paint adhesion and preventing flashing, which can result
in uneven sheen. Using a quality primer also enhances the overall appearance of the finished
paint job, making it essential for achieving a professional look.
Expert Tips for Seamless Drywall Crack Repairs from The Patch Guyz
If you're tackling drywall cracks on your own, The Patch Guyz provides a simple, cost-effective
approach to get the job done right. Start by cleaning the crack area and applying a patching
compound or joint compound with a putty knife. Smooth the compound evenly, ensuring it fills
the crack completely. After it dries, sand the area until smooth, and then apply a coat of primer
and paint for a seamless finish. While small repairs are manageable, for larger or more extensive
damage, The Patch Guyz is here to ensure a professional, long-lasting result with minimal hassle.

Related Articles
Ultimate Guide: How To Repair Textured Walls Like A Pro
Ultimate Guide: How to Repair Textured Walls Like a Pro Textured walls have become a defining feature in countless homes across Southeastern Michigan,…
The Ultimate Guide to Finding the Best Drywall Repair Services Near You
Finding the Best Drywall Repair Services Near You: A Comprehensive Guide When damage strikes your walls or ceilings, finding reliable repair services …
Flawless Walls: The Complete Guide to Professional Drywall Crack Repair
Expert Guide to Professional Drywall Crack Repair Services Discovering cracks in your drywall can be frustrating, whether you're a homeowner dealing w…