A Complete Guide to Removing Popcorn Ceiling: Methods, Costs, and Tips
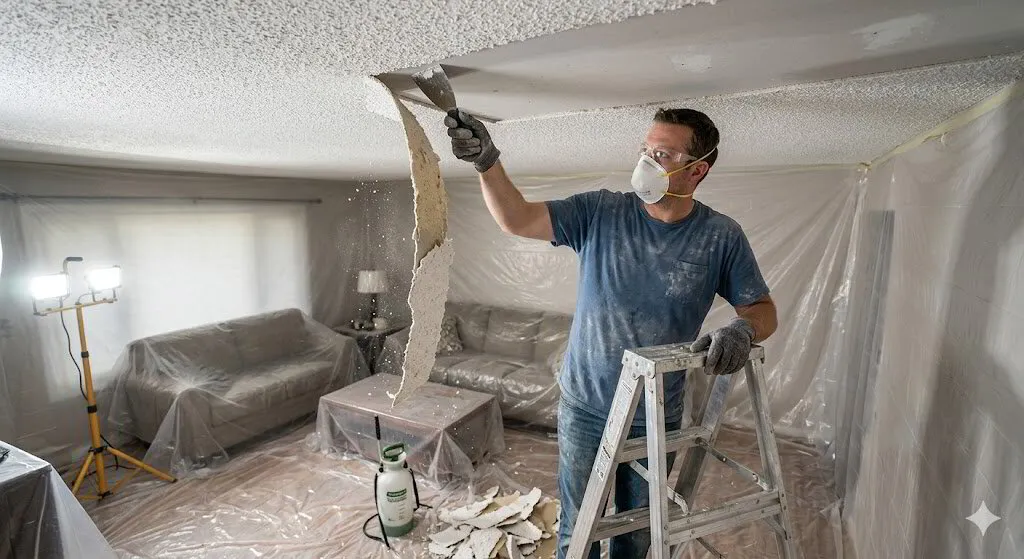
Popcorn ceilings, once a hallmark of mid-century home design, have fallen dramatically out of favor with modern homeowners. These textured surfaces, characterized by their bumpy, cottage cheese-like appearance, were popular from the 1950s through the 1980s for their ability to hide imperfections and provide acoustic dampening. However, today's design trends favor clean, smooth ceiling surfaces that create a more contemporary and spacious feel.
If you're a homeowner in Southeastern Michigan looking to modernize your living space, understanding how to remove popcorn ceiling safely and effectively is crucial. Whether you're preparing to sell your property, updating your home's aesthetic, or addressing maintenance issues, popcorn ceiling removal can significantly enhance your property's value and appeal. This comprehensive guide will walk you through every aspect of the removal process, from understanding potential risks to comparing professional services with DIY approaches, ensuring you make informed decisions that align with your budget and timeline.
Understanding Popcorn Ceilings
Popcorn ceilings, also known as acoustic ceilings, stipple ceilings, or cottage cheese ceilings, are textured ceiling treatments created by spraying a mixture of paint and materials like Styrofoam or vermiculite onto ceiling surfaces. This technique became widely popular because it effectively concealed ceiling imperfections, reduced noise transmission between floors, and provided a cost-effective finishing option for builders and homeowners.
The primary reasons homeowners choose to remove these textured surfaces today include aesthetic modernization, easier maintenance, and improved lighting reflection. Smooth ceilings create a cleaner, more contemporary appearance that aligns with current interior design trends. Additionally, popcorn textures tend to collect dust, cobwebs, and cooking residue over time, making them challenging to clean effectively. For more insight on this upgrade, read our post on the transformative power of popcorn ceiling removal.
Current ceiling design trends strongly favor smooth, flat surfaces that can be easily painted and maintained. Modern homeowners prefer ceilings that complement minimalist design principles and provide better light distribution throughout living spaces. Smooth ceilings also make rooms appear larger and more open, contributing to the overall sense of spaciousness that contemporary buyers seek. Furthermore, flat ceilings offer greater flexibility for installing modern lighting fixtures, ceiling fans, and smart home technologies that require clean, accessible mounting surfaces.
Understanding the Risks of Removing Popcorn Ceilings
The most significant concern when considering popcorn ceiling removal involves potential asbestos exposure. Homes built before 1980 may contain asbestos fibers within the popcorn texture material, as asbestos was commonly used in construction materials until health risks became widely recognized. Asbestos exposure can cause serious respiratory conditions, including mesothelioma and lung cancer, making professional testing essential before beginning any removal project.
Before starting any removal work, homeowners must conduct asbestos testing through certified laboratories. This process involves carefully collecting small samples of the ceiling material and sending them for professional analysis. If asbestos is present, specialized abatement procedures and licensed professionals are required to ensure safe removal. Never attempt to remove asbestos-containing popcorn ceilings without proper certification and equipment.
Health and safety precautions extend beyond asbestos concerns. The removal process generates significant dust and debris that can irritate respiratory systems and eyes. Proper ventilation, protective equipment including N95 masks, safety goggles, and coveralls are essential. Additionally, the physical demands of overhead work can cause neck and shoulder strain, while the risk of falls from ladders requires careful attention to safety protocols.
The impact on existing ceiling structure must also be considered. Aggressive removal techniques can damage underlying drywall, requiring additional repair work and increasing project costs. Some popcorn textures are applied over multiple paint layers, making removal more challenging and potentially damaging to the ceiling surface underneath. If your underlying drywall takes a hit, relying on a professional drywall repair service is crucial to keep the project on track.
Comparison of Methods to Remove Popcorn Ceilings
Understanding different popcorn ceiling removal methods helps homeowners choose the most appropriate approach for their specific situation. Each method offers distinct advantages and limitations that should be carefully evaluated based on ceiling condition, timeline, and skill level.
Manual Scraping vs. Spraying with Water
Manual scraping involves using putty knives or specialized scrapers to remove dry popcorn texture. This method works best when the texture hasn't been painted over, allowing material to flake off relatively easily. The primary advantage is reduced mess and water damage risk, but it requires more physical effort and may not be effective on all ceiling types.
The water spraying method involves misting ceiling sections with warm water to soften the texture before scraping. This approach typically makes removal easier and faster, as the moisture helps break down the adhesive properties of the texture material. However, it creates more mess, increases the risk of water damage to floors and walls, and requires careful moisture management to prevent mold growth.
Using Popcorn Ceiling Removal Kits
Commercial removal kits provide specialized tools and solutions designed specifically for popcorn ceiling removal. These kits typically include texture removal solutions, specialized scrapers, and protective materials. While more expensive than basic tools, they can improve efficiency and results for DIY projects.
Professional Services vs. DIY Approaches
Professional ceiling removal services offer expertise, proper equipment, and insurance coverage that protect homeowners from potential issues. Professionals can quickly identify asbestos concerns, complete removal efficiently, and handle necessary repairs seamlessly. They also carry liability insurance and can guarantee their work quality. Learn more about the benefits of professional removal in our dedicated guide.
DIY removal can save money but requires significant time investment, physical effort, and assumes responsibility for all potential complications. Homeowners must purchase or rent equipment, handle debris disposal, and manage any resulting repairs. The learning curve can be steep, and mistakes may result in additional costs that exceed professional service fees.
How to Safely Remove Popcorn Ceiling (Step-by-Step Guide)
Successfully completing DIY popcorn ceiling removal requires careful planning, proper tools, and methodical execution. This comprehensive guide provides detailed steps for safe and effective removal.
Gathering Necessary Tools and Materials
Essential tools include wide putty knives or specialized popcorn ceiling scrapers, spray bottles or garden sprayers for water application, plastic sheeting for floor and furniture protection, and painter's tape for securing protective materials. Safety equipment must include N95 or P100 respirator masks, safety goggles, work gloves, and long-sleeved clothing or coveralls.
Additional materials needed are drop cloths, trash bags for debris collection, stepladders or scaffolding for safe ceiling access, and basic repair supplies including joint compound and sandpaper for addressing any ceiling damage that occurs during removal.
Preparation of the Area
Thorough preparation significantly impacts project success and cleanup efficiency. Remove all furniture from the room or move it to the center and cover completely with plastic sheeting. Turn off electricity to ceiling fixtures and remove light fixtures, ceiling fans, and any mounted hardware.
Cover floors with multiple layers of protection, starting with rosin paper or plastic sheeting, followed by canvas drop cloths to absorb moisture and provide slip-resistant surfaces. Seal heating and cooling vents with plastic and tape to prevent debris from entering ductwork. Open windows and use fans to maintain good ventilation throughout the removal process.
Detailed Step-by-Step Removal Process
Begin by testing a small, inconspicuous area to determine the best removal approach for your specific ceiling. If the popcorn texture hasn't been painted, it may scrape off dry. However, most ceilings benefit from light water application to soften the material.
Start the removal process by working in manageable sections of approximately 4x4 feet. Lightly spray the ceiling section with warm water, allowing 10-15 minutes for moisture absorption. Avoid over-saturating, which can damage underlying drywall or cause water to drip excessively.
Using a wide putty knife or specialized scraper held at a shallow angle, gently scrape the softened texture from the ceiling surface. Work systematically across each section, maintaining consistent pressure to avoid gouging the underlying surface. Collect debris in trash bags immediately to maintain a clean work area.
After completing each section, inspect the ceiling surface for any remaining texture or damage. Light sanding may be necessary to smooth rough areas, followed by primer application to seal the surface before painting. Some areas may require joint compound application to fill small gouges or imperfections created during the removal process.
Continue this process throughout the entire ceiling, maintaining consistent technique and safety precautions. Take regular breaks to avoid fatigue, which can lead to accidents or poor workmanship. Upon completion, thoroughly clean all debris and allow the ceiling to dry completely before beginning any repair or finishing work.
Cost Analysis of Removing Popcorn Ceilings
Understanding the financial implications of popcorn ceiling removal helps homeowners make informed decisions about DIY versus professional approaches. Cost considerations extend beyond initial removal to include preparation, repairs, and finishing work.
DIY popcorn ceiling removal typically costs between $300-800 for an average-sized room, including tool rental, materials, and disposal fees. This estimate assumes no asbestos complications and minimal repair requirements. However, hidden costs can include additional repair materials, primer, paint, and potential professional consultation if complications arise.
Professional popcorn ceiling removal services generally charge $3-7 per square foot, depending on ceiling condition, room accessibility, and local market rates. For a typical 12x15 foot room (180 square feet), professional removal costs range from $540-1,260. This price typically includes removal, basic repairs, priming, and sometimes painting services.
Several factors significantly influence overall project costs. Ceiling height affects labor complexity and equipment requirements, with vaulted or high ceilings commanding premium pricing. Asbestos testing adds $200-500 to project costs, while asbestos abatement can increase expenses by $5-15 per square foot. Room accessibility, furniture moving requirements, and the extent of necessary repairs also impact final pricing.
Cost-effective strategies include obtaining multiple professional quotes, scheduling work during contractors' slower seasons, and combining multiple rooms or services to achieve volume pricing. Consider the value of your time when comparing DIY versus professional approaches, factoring in the learning curve, physical demands, and potential complications that could extend project timelines significantly.
Aftermath: Repairing and Finishing the Ceiling
Once popcorn texture removal is complete, proper ceiling finishing ensures professional-quality results that enhance your home's appearance and value. This phase often determines the overall project success and long-term satisfaction with the renovation.
Smoothing Out the Surface
Post-removal ceiling surfaces typically require some degree of repair and smoothing. Small gouges, scratches, or imperfections created during scraping need attention before painting. Begin by thoroughly cleaning the ceiling surface to remove all dust and debris using a tack cloth or slightly damp sponge.
Apply joint compound to fill any gouges, scratches, or imperfections using a wide putty knife. Work in thin, even coats to avoid creating new texture or uneven surfaces. Allow each coat to dry completely before applying additional layers. Most ceilings require 2-3 coats of joint compound for optimal smoothness.
After the final coat dries, sand the entire ceiling surface using fine-grit sandpaper (120-150 grit) to achieve uniform smoothness. Use a sanding pole for easier overhead work and wear appropriate dust protection. Clean the surface thoroughly after sanding to ensure proper paint adhesion.
Painting Options and Recommendations
Proper priming is essential for achieving professional painting results on newly smoothed ceilings. Use a high-quality primer designed for drywall surfaces, which seals the surface and provides uniform paint adhesion. Primer also helps identify any remaining imperfections that need additional attention. If you are handling this phase, check out our insights on drywall painting prep.
Choose ceiling paint specifically formulated for overhead surfaces, which typically offers better coverage, reduced spattering, and appropriate sheen levels. Flat or matte finishes work best for most ceilings, as they minimize imperfection visibility and reduce glare. Apply paint using high-quality rollers with appropriate nap length for smooth surfaces.
Considerations for Re-texturing or Alternatives
Some homeowners prefer subtle texture alternatives to completely smooth ceilings. Light orange peel texture, applied with specialized rollers or spray equipment, provides visual interest while maintaining a contemporary appearance. Knockdown texture offers another modern alternative that's easier to maintain than popcorn texture. We offer a full range of textured wall and ceiling solutions if you decide to go this route.
Consider architectural elements like coffered ceilings, beadboard, or decorative molding as alternatives that add character while addressing any remaining ceiling imperfections. These options can transform ordinary ceilings into focal points while avoiding the challenges of achieving perfectly smooth surfaces.
Conclusion and Final Tips
Successfully removing popcorn ceilings requires careful planning, proper safety precautions, and realistic expectations about the time and effort involved. Whether choosing DIY or professional approaches, understanding the process helps ensure satisfactory results that enhance your home's value and aesthetic appeal.
Key considerations include mandatory asbestos testing for homes built before 1980, proper safety equipment and ventilation, and realistic assessment of your skill level and available time. Professional services offer expertise, efficiency, and liability protection that often justify their cost, particularly for larger projects or when asbestos concerns exist.
Budget planning should include all project phases, from initial testing through final painting, with contingencies for unexpected repairs or complications. Consider the long-term benefits of professional work, including warranties, insurance coverage, and the assurance of proper completion.
For homeowners in Southeastern Michigan, successful popcorn ceiling removal can significantly enhance property value and marketability. Modern, smooth ceilings appeal to contemporary buyers and create more attractive, maintainable living spaces. However, the complexity of this renovation often benefits from professional expertise.
The decision between DIY and professional removal ultimately depends on your comfort level with home improvement projects, available time, and budget considerations. Regardless of your chosen approach, prioritize safety, proper preparation, and quality finishing work to achieve results that meet your expectations and enhance your home's appeal.
Ready to transform your ceilings with professional expertise?
Contact The Patch Guyz for a free consultation on popcorn ceiling removal and ceiling restoration services. Our experienced team serves Southeastern Michigan homeowners with fast, transparent service and high-quality craftsmanship that ensures your ceiling repairs blend seamlessly with existing finishes.
Schedule Your Assessment TodayRelated Articles
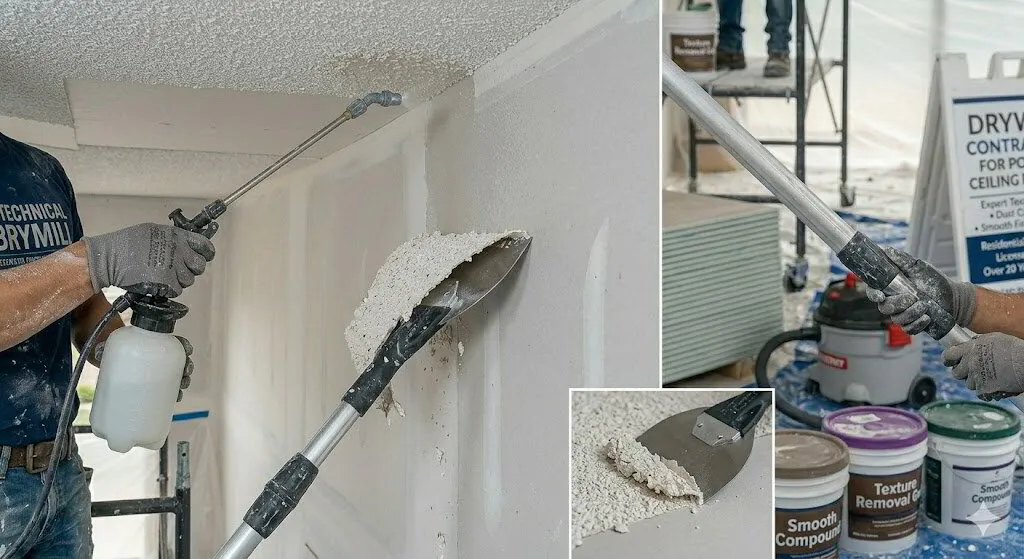
Expert Guide to Hiring Licensed Drywall Contractors for Popcorn Ceiling Removal
Introduction Popcorn ceilings, once a popular design choice in homes built between the 1950s and 1980s, have fallen out of favor with modern homeowner…